Wirepas networks
This chapter describes what Wirepas networks are and how to create, manage and deploy them.
The Wirepas networks page allows you to configure and deploy gateway software that connects the Wirepas mesh to the server. Each network creates a composition that behaves like a blueprint for your Wirepas application that runs on your gateway. This composition is automatically assigned to the fleet of devices you connect your Wirepas network to.
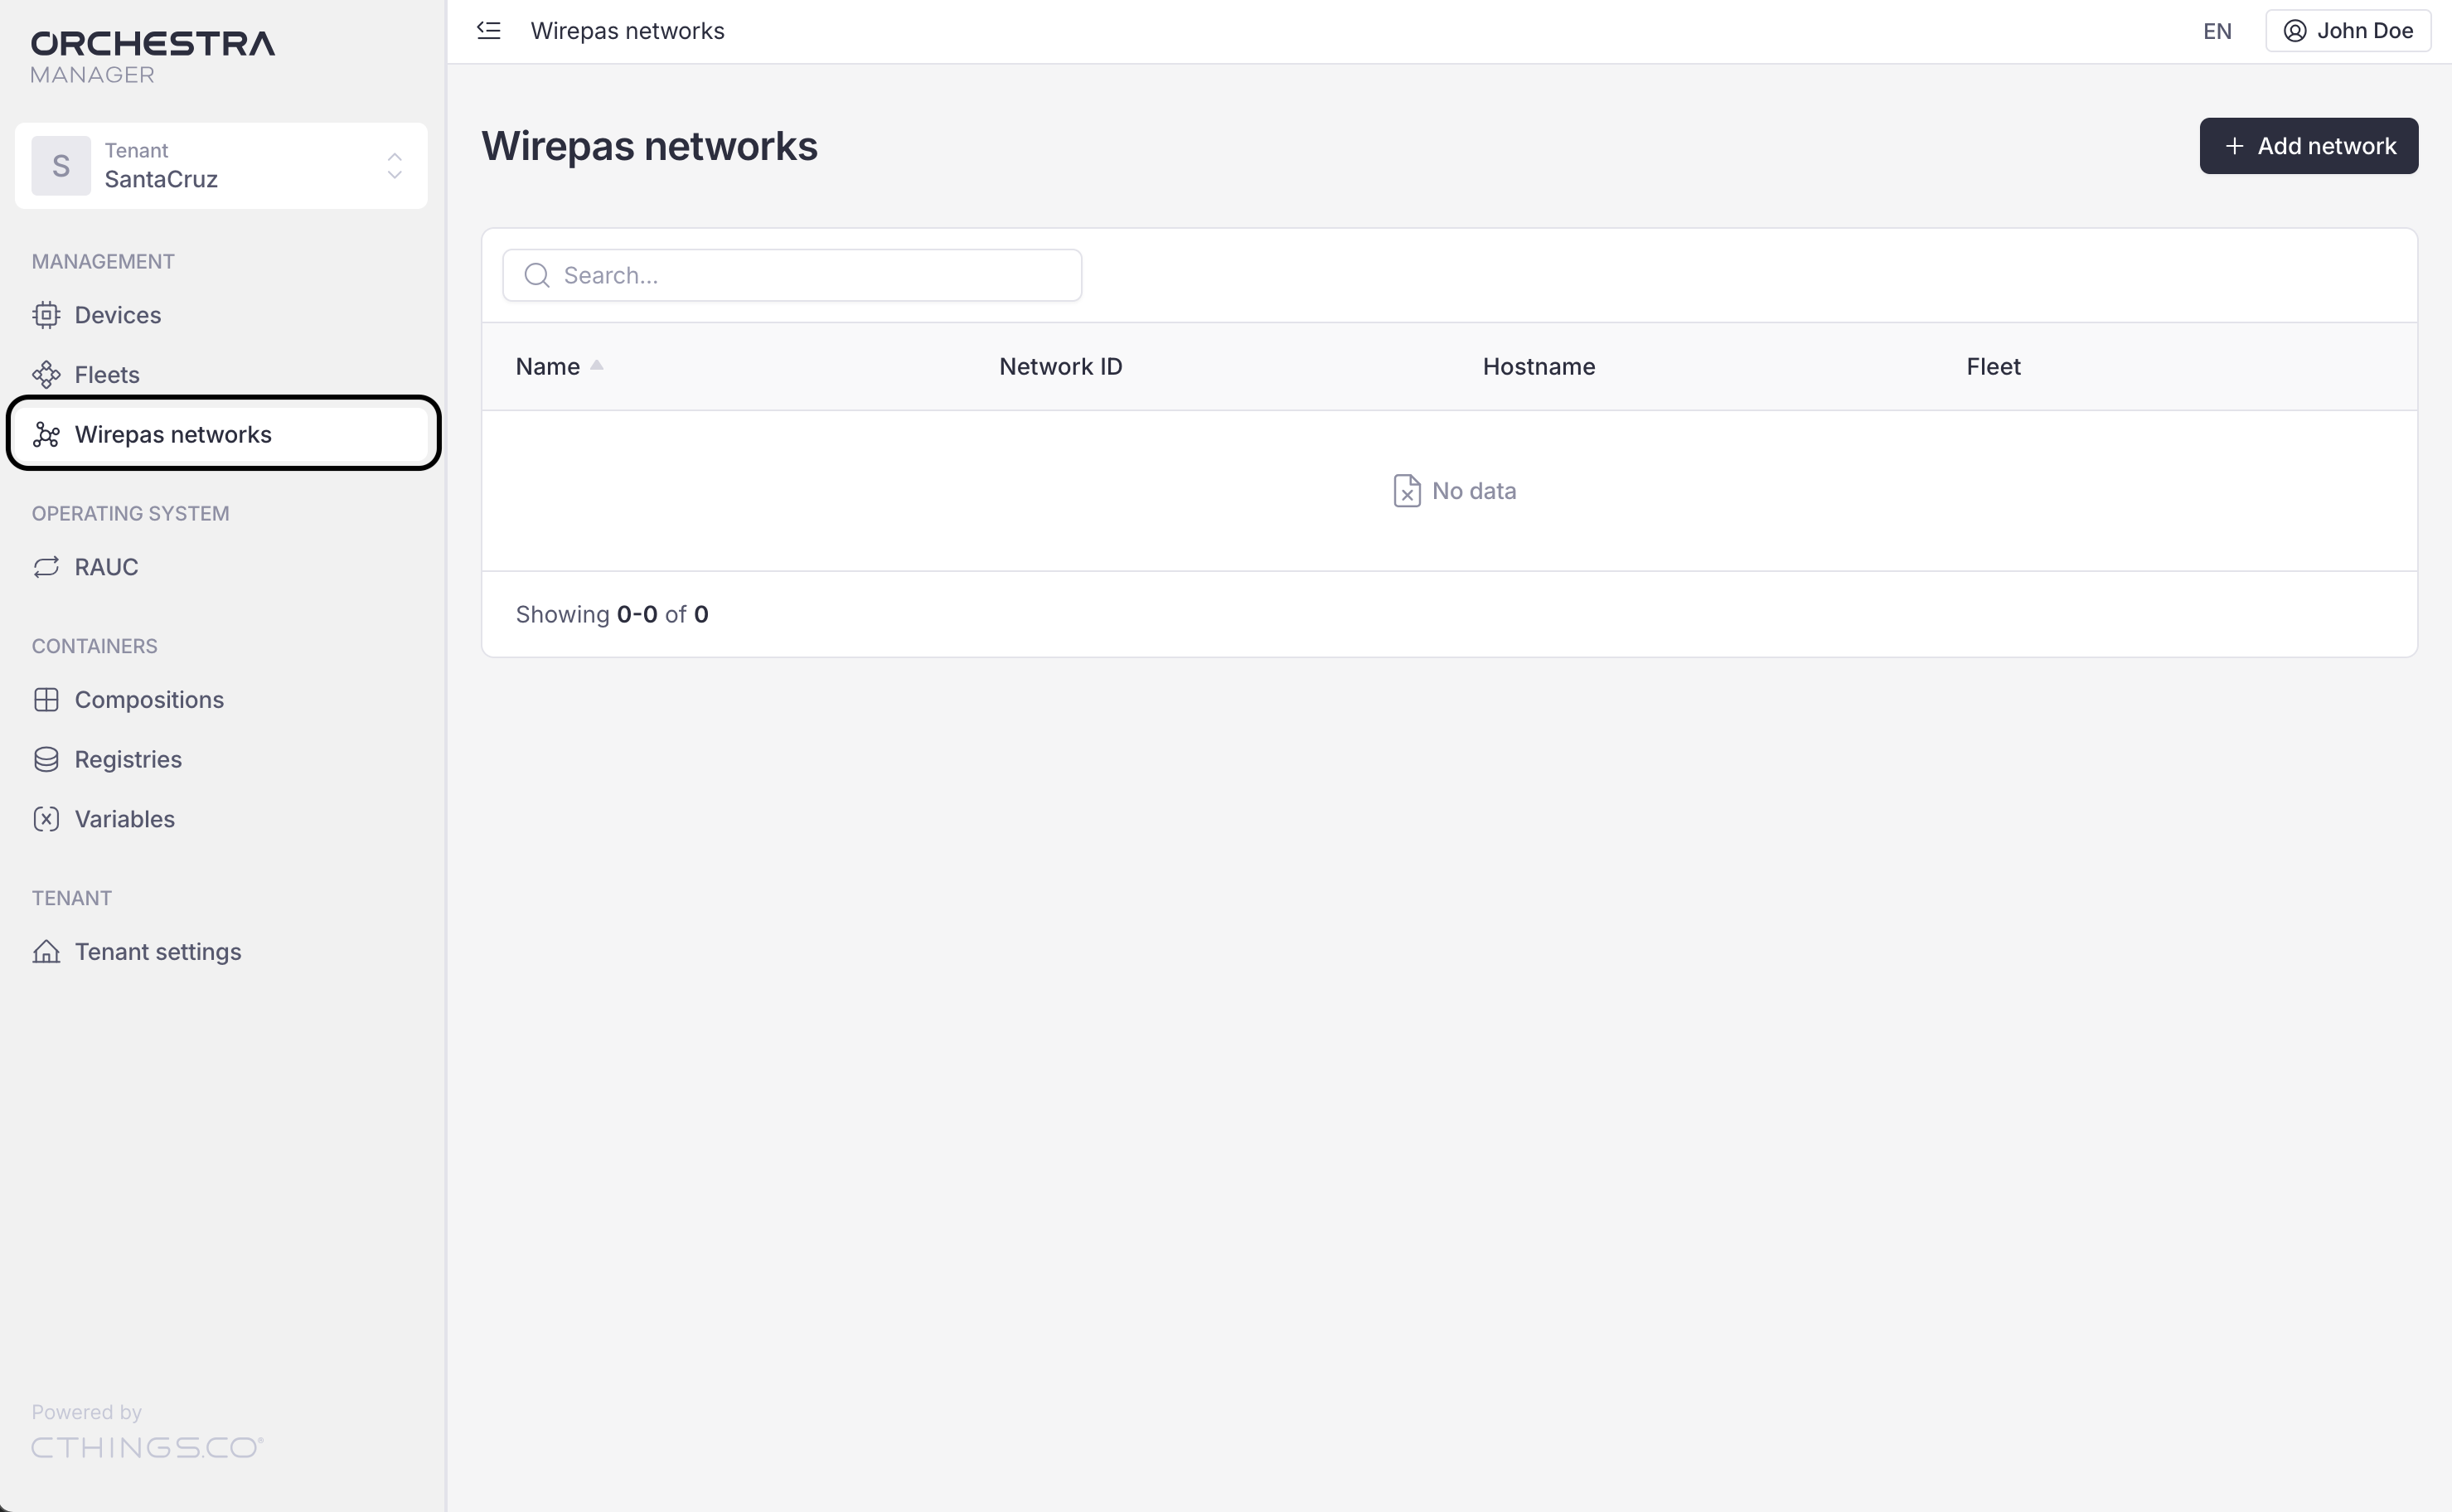
The Wirepas networks tab is in the sidebar, as shown in the following figure.
Before you start
You’ll need:
the Wirepas feature turned on in Marketplace.
your gateways equipped with the Wirepas Connectivity Card and onboarded.
the following values:
Wirepas Mesh MQTT username, password, hostname and port,
network ID and channel,
gateway stack version.
Warning
The feature cannot be turned off in Marketplace until any network exists.
Create a Wirepas network
Click the + Add network button in the top right corner, and a pop-up appears. Follow the next 5 steps to create your network.
Configure the network parameters
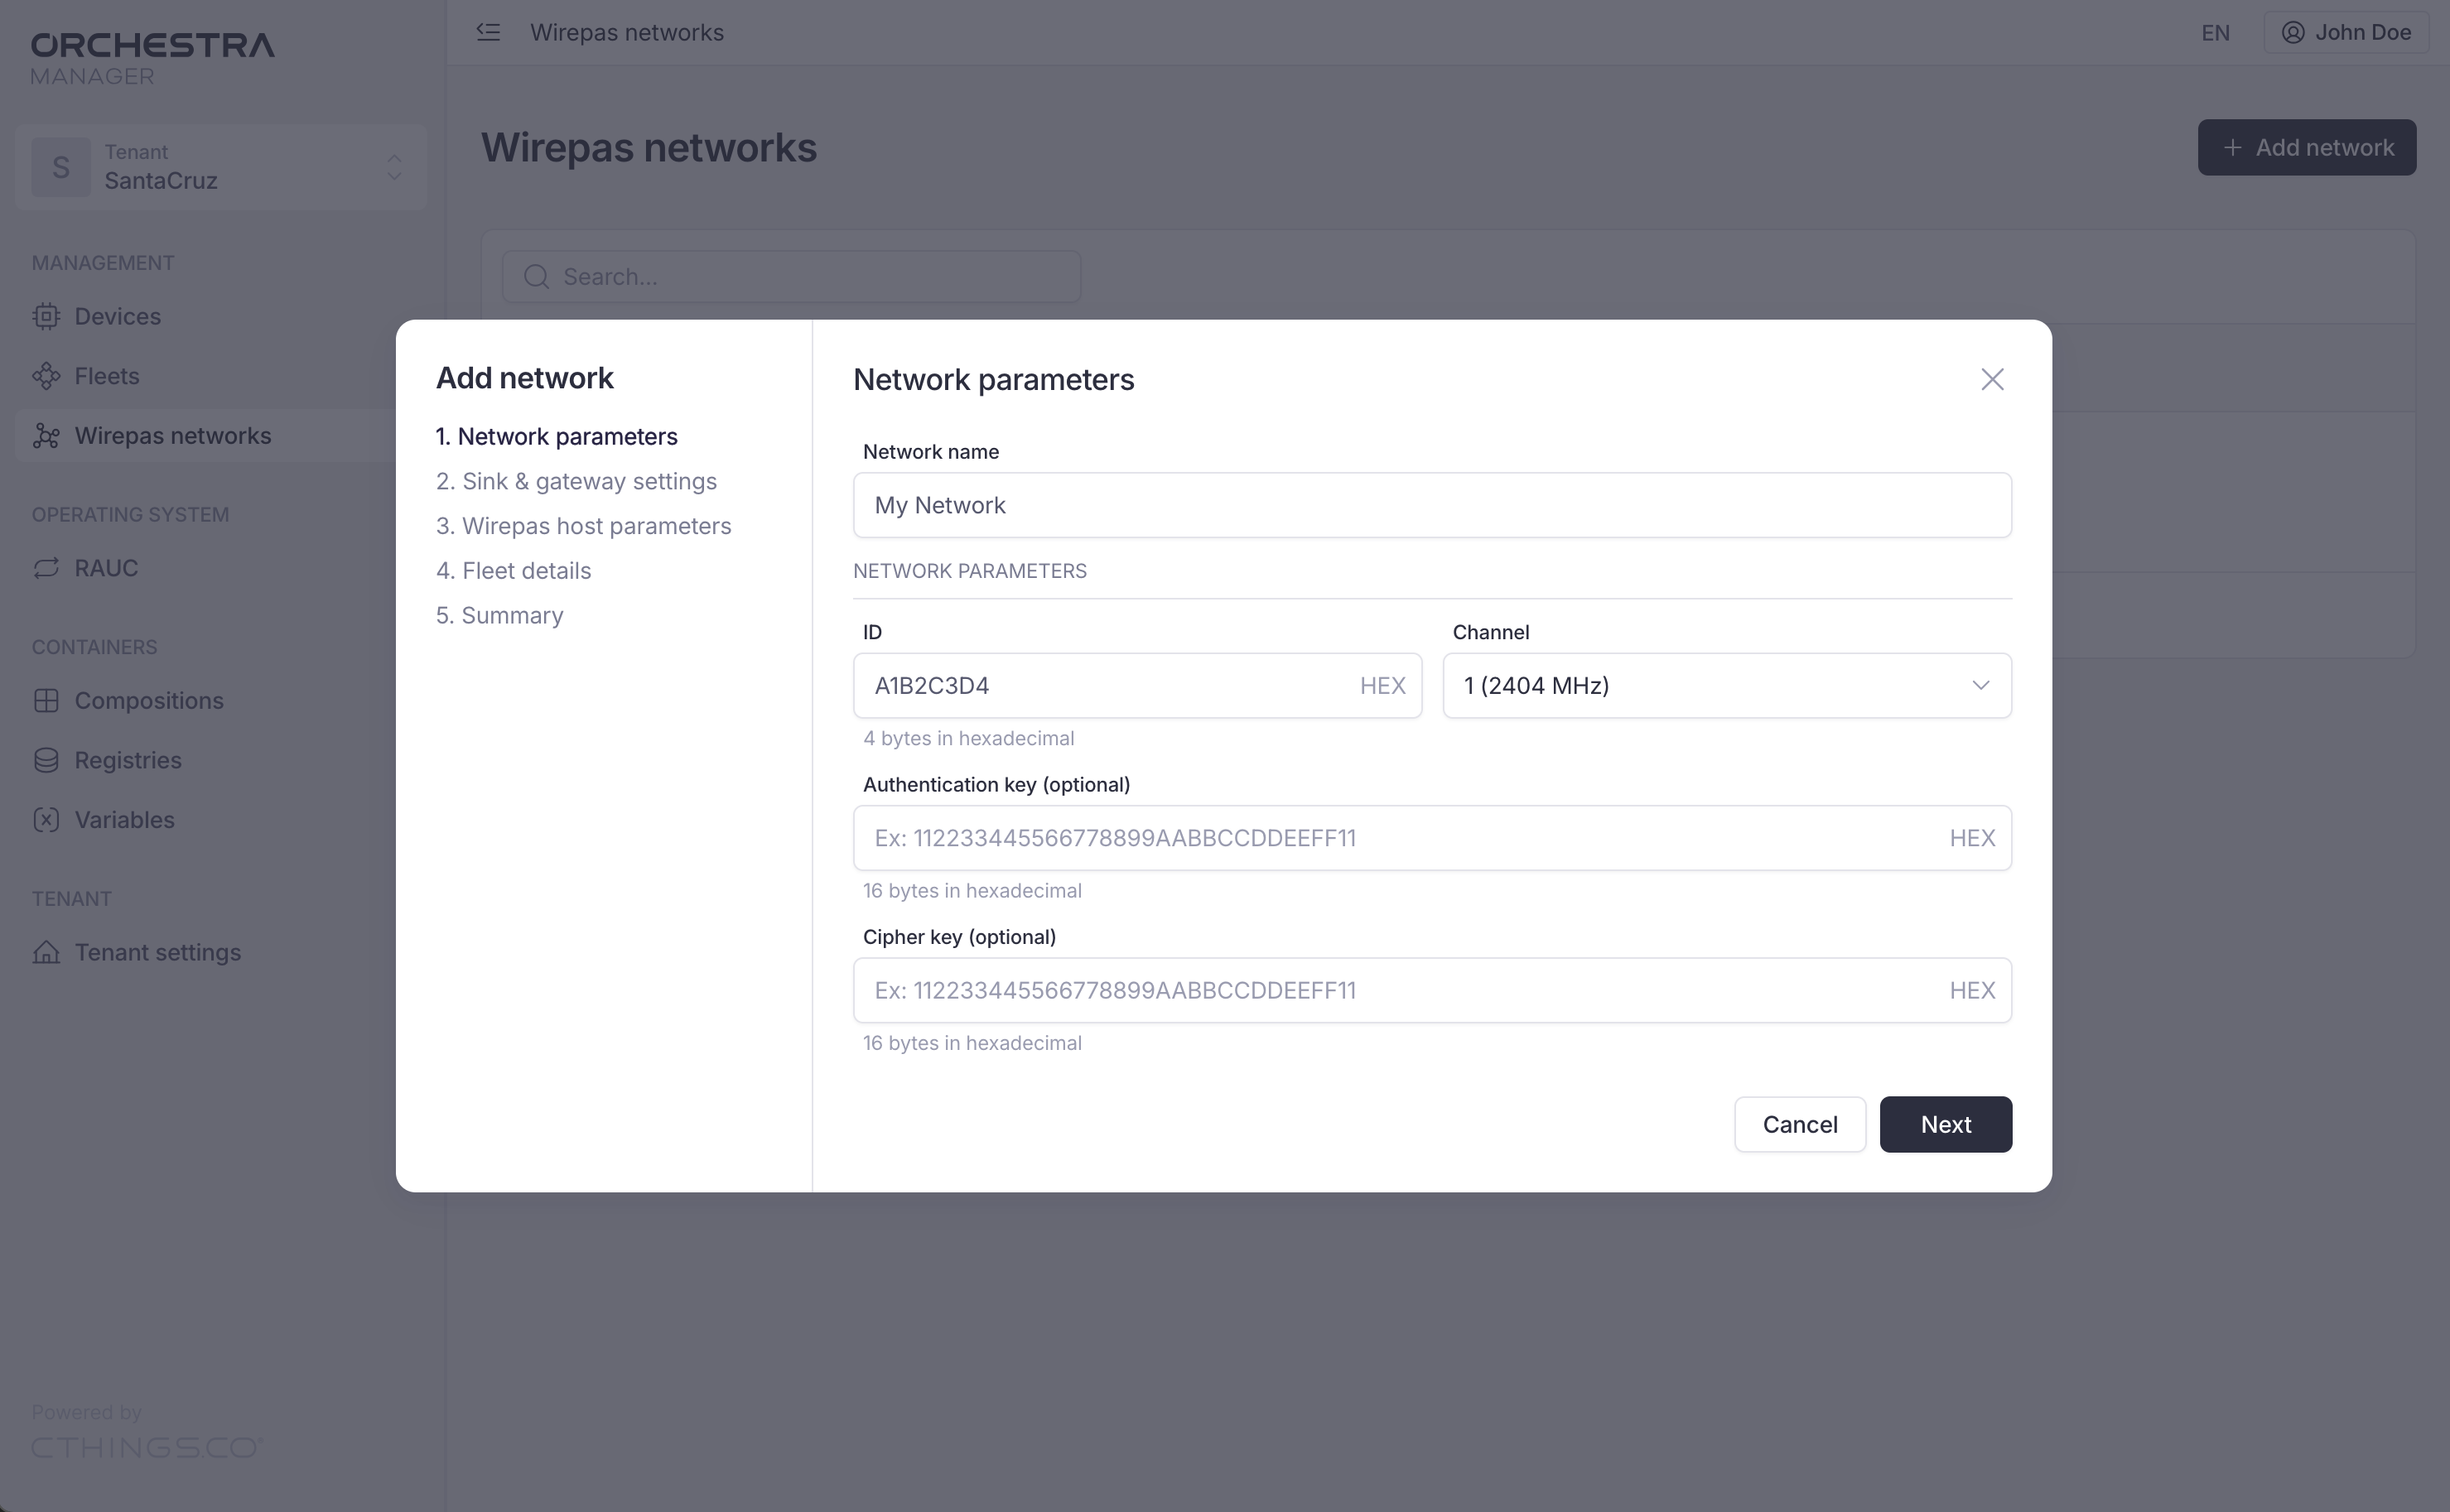
In the Network parameters step:
Give your network a name.
Provide the network ID and channel your Wirepas mesh works on. The ID must be exactly 8 hex characters, for example,
A1B2C3D4.Give this network authentication and cipher keys.
Important
Keys are optional, but they play an important role in the security of your mesh. It is better to provide them.
Set up the sink and gateway
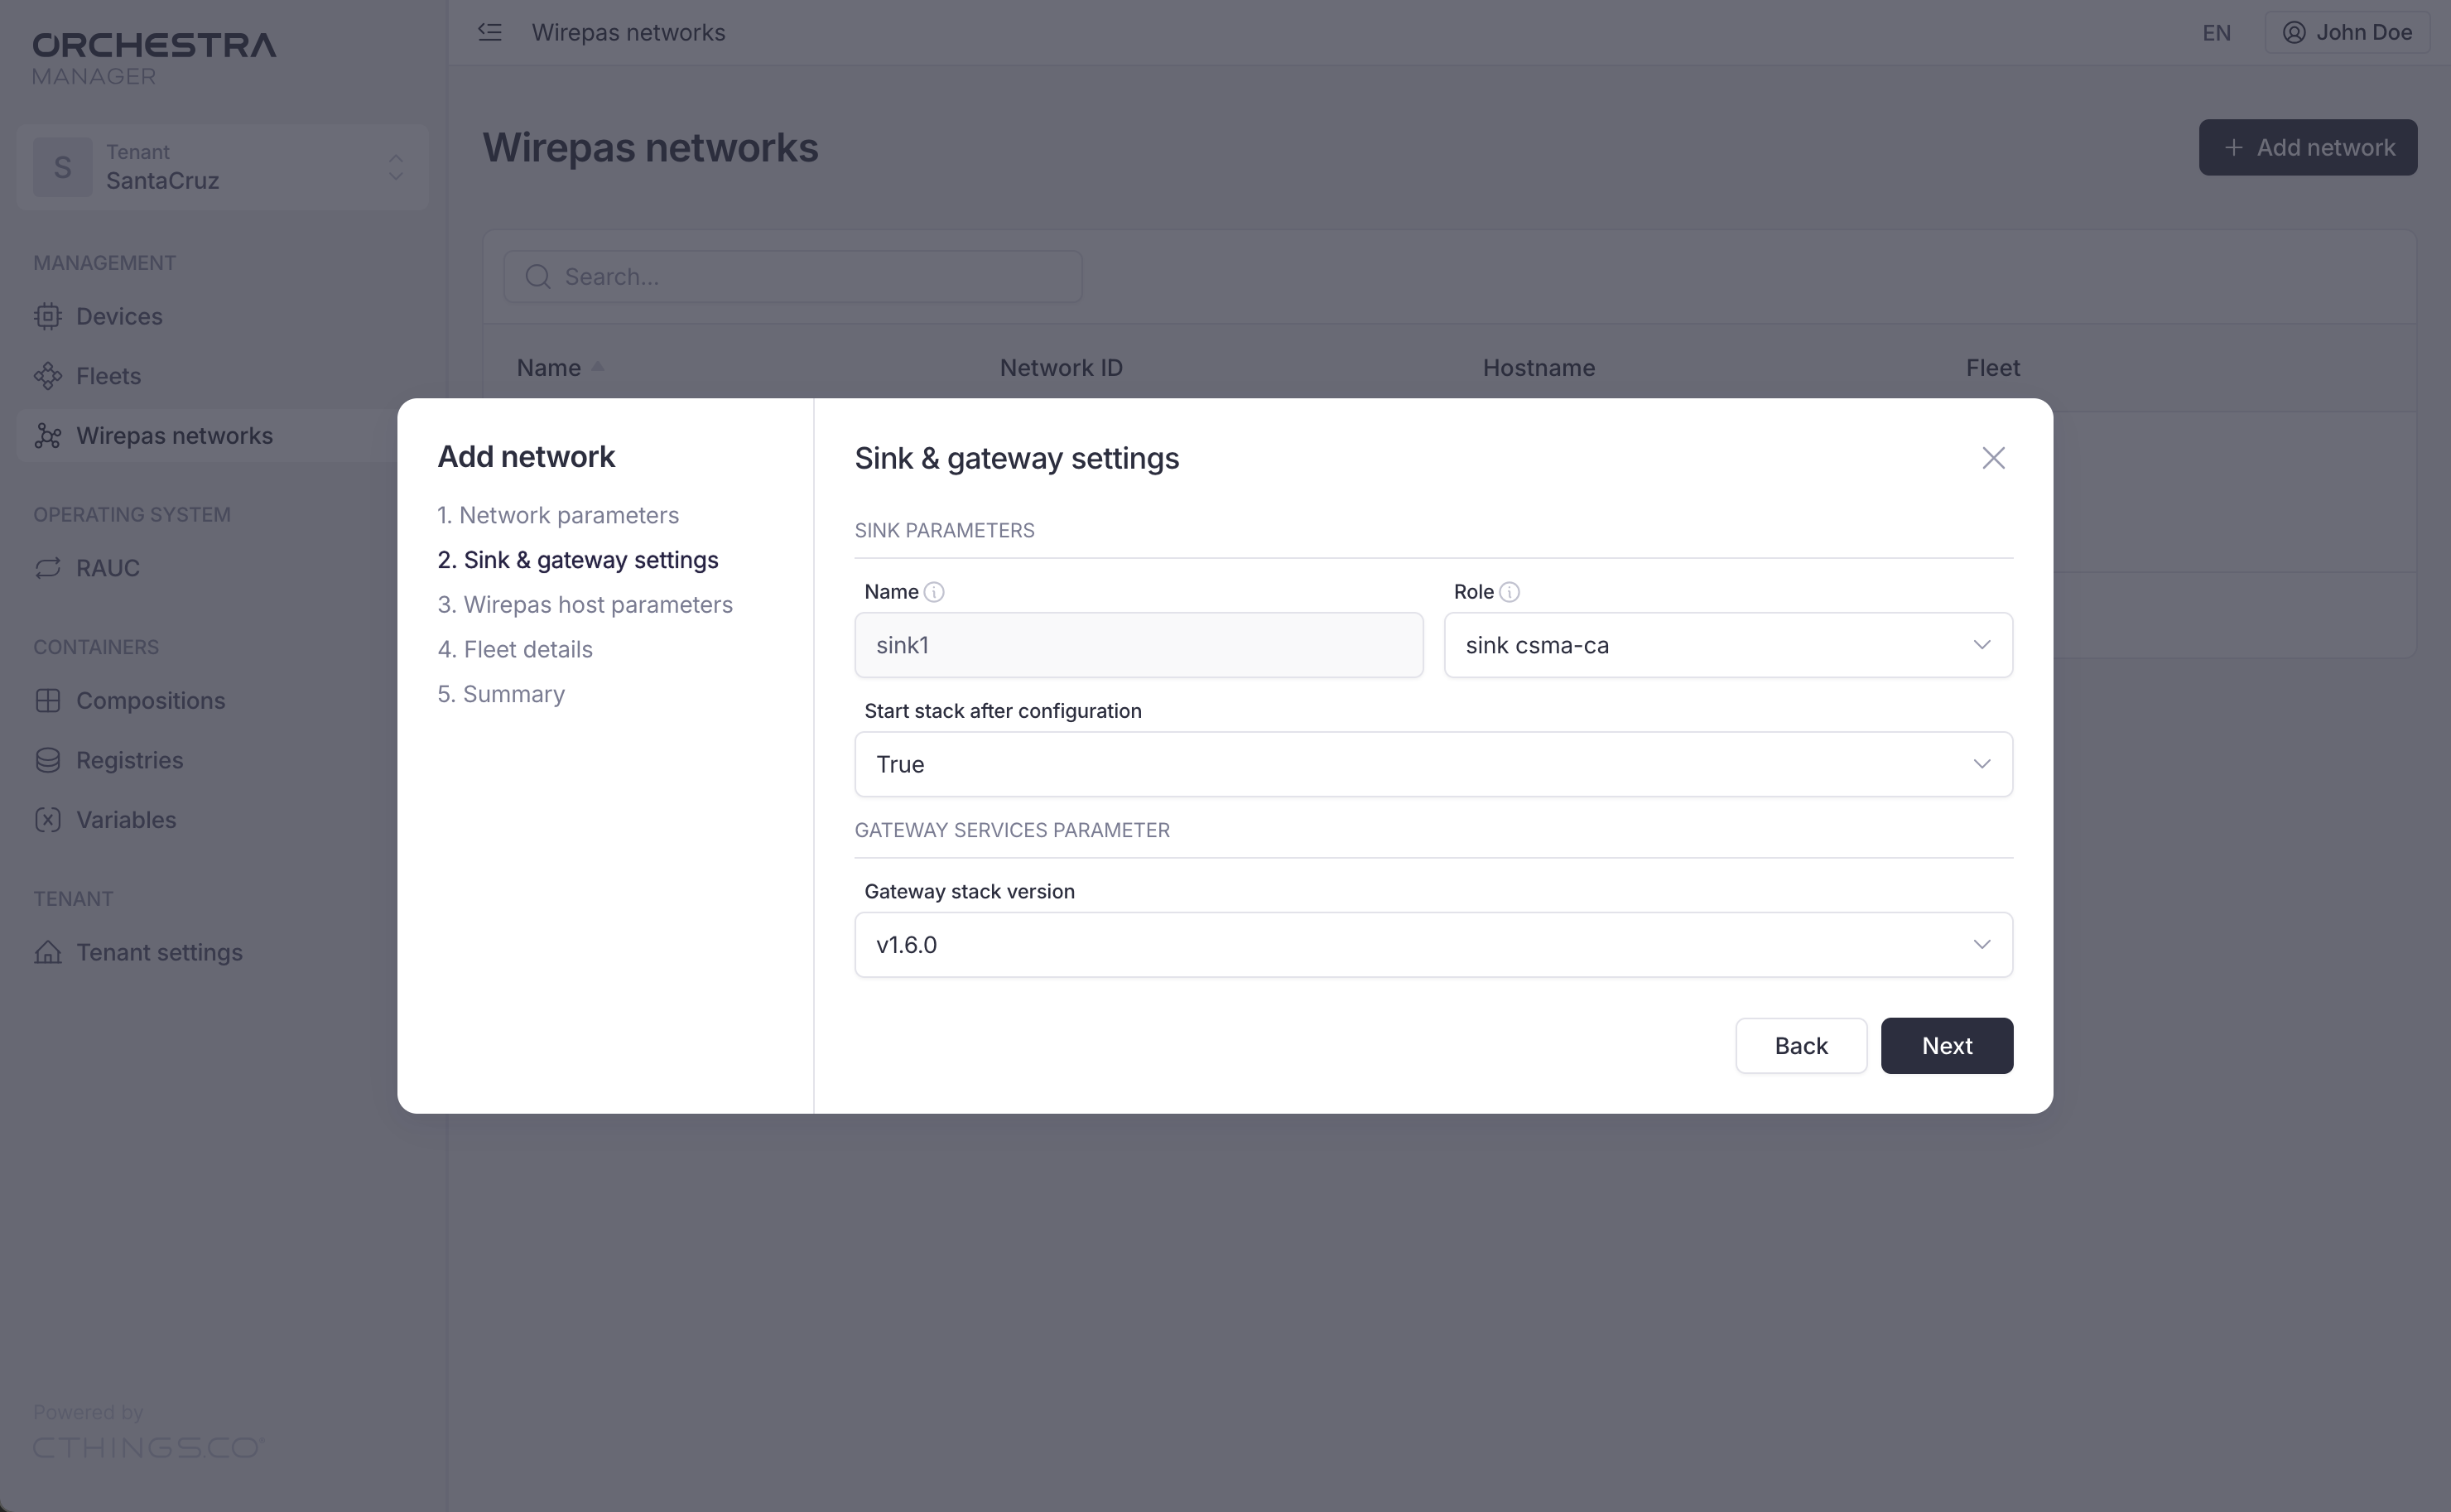
In the Sink & gateway settings step, you can see the name of your sink. This field is read-only, but you can change the name of your sink later in the fleet’s variables section; see Change the sink name.
Select the sink role. There are two possible options:
Role
Description
sink csma-caYour sink is a place where data from the mesh leaves.
router csma-ca autoroleYour sink behaves like a router in your mesh.
In the Start stack after configuration field, select either True or False. If set to False, after configuration, the stack does not start automatically.
In the last field, select the gateway stack version.
Set the Wirepas host parameters
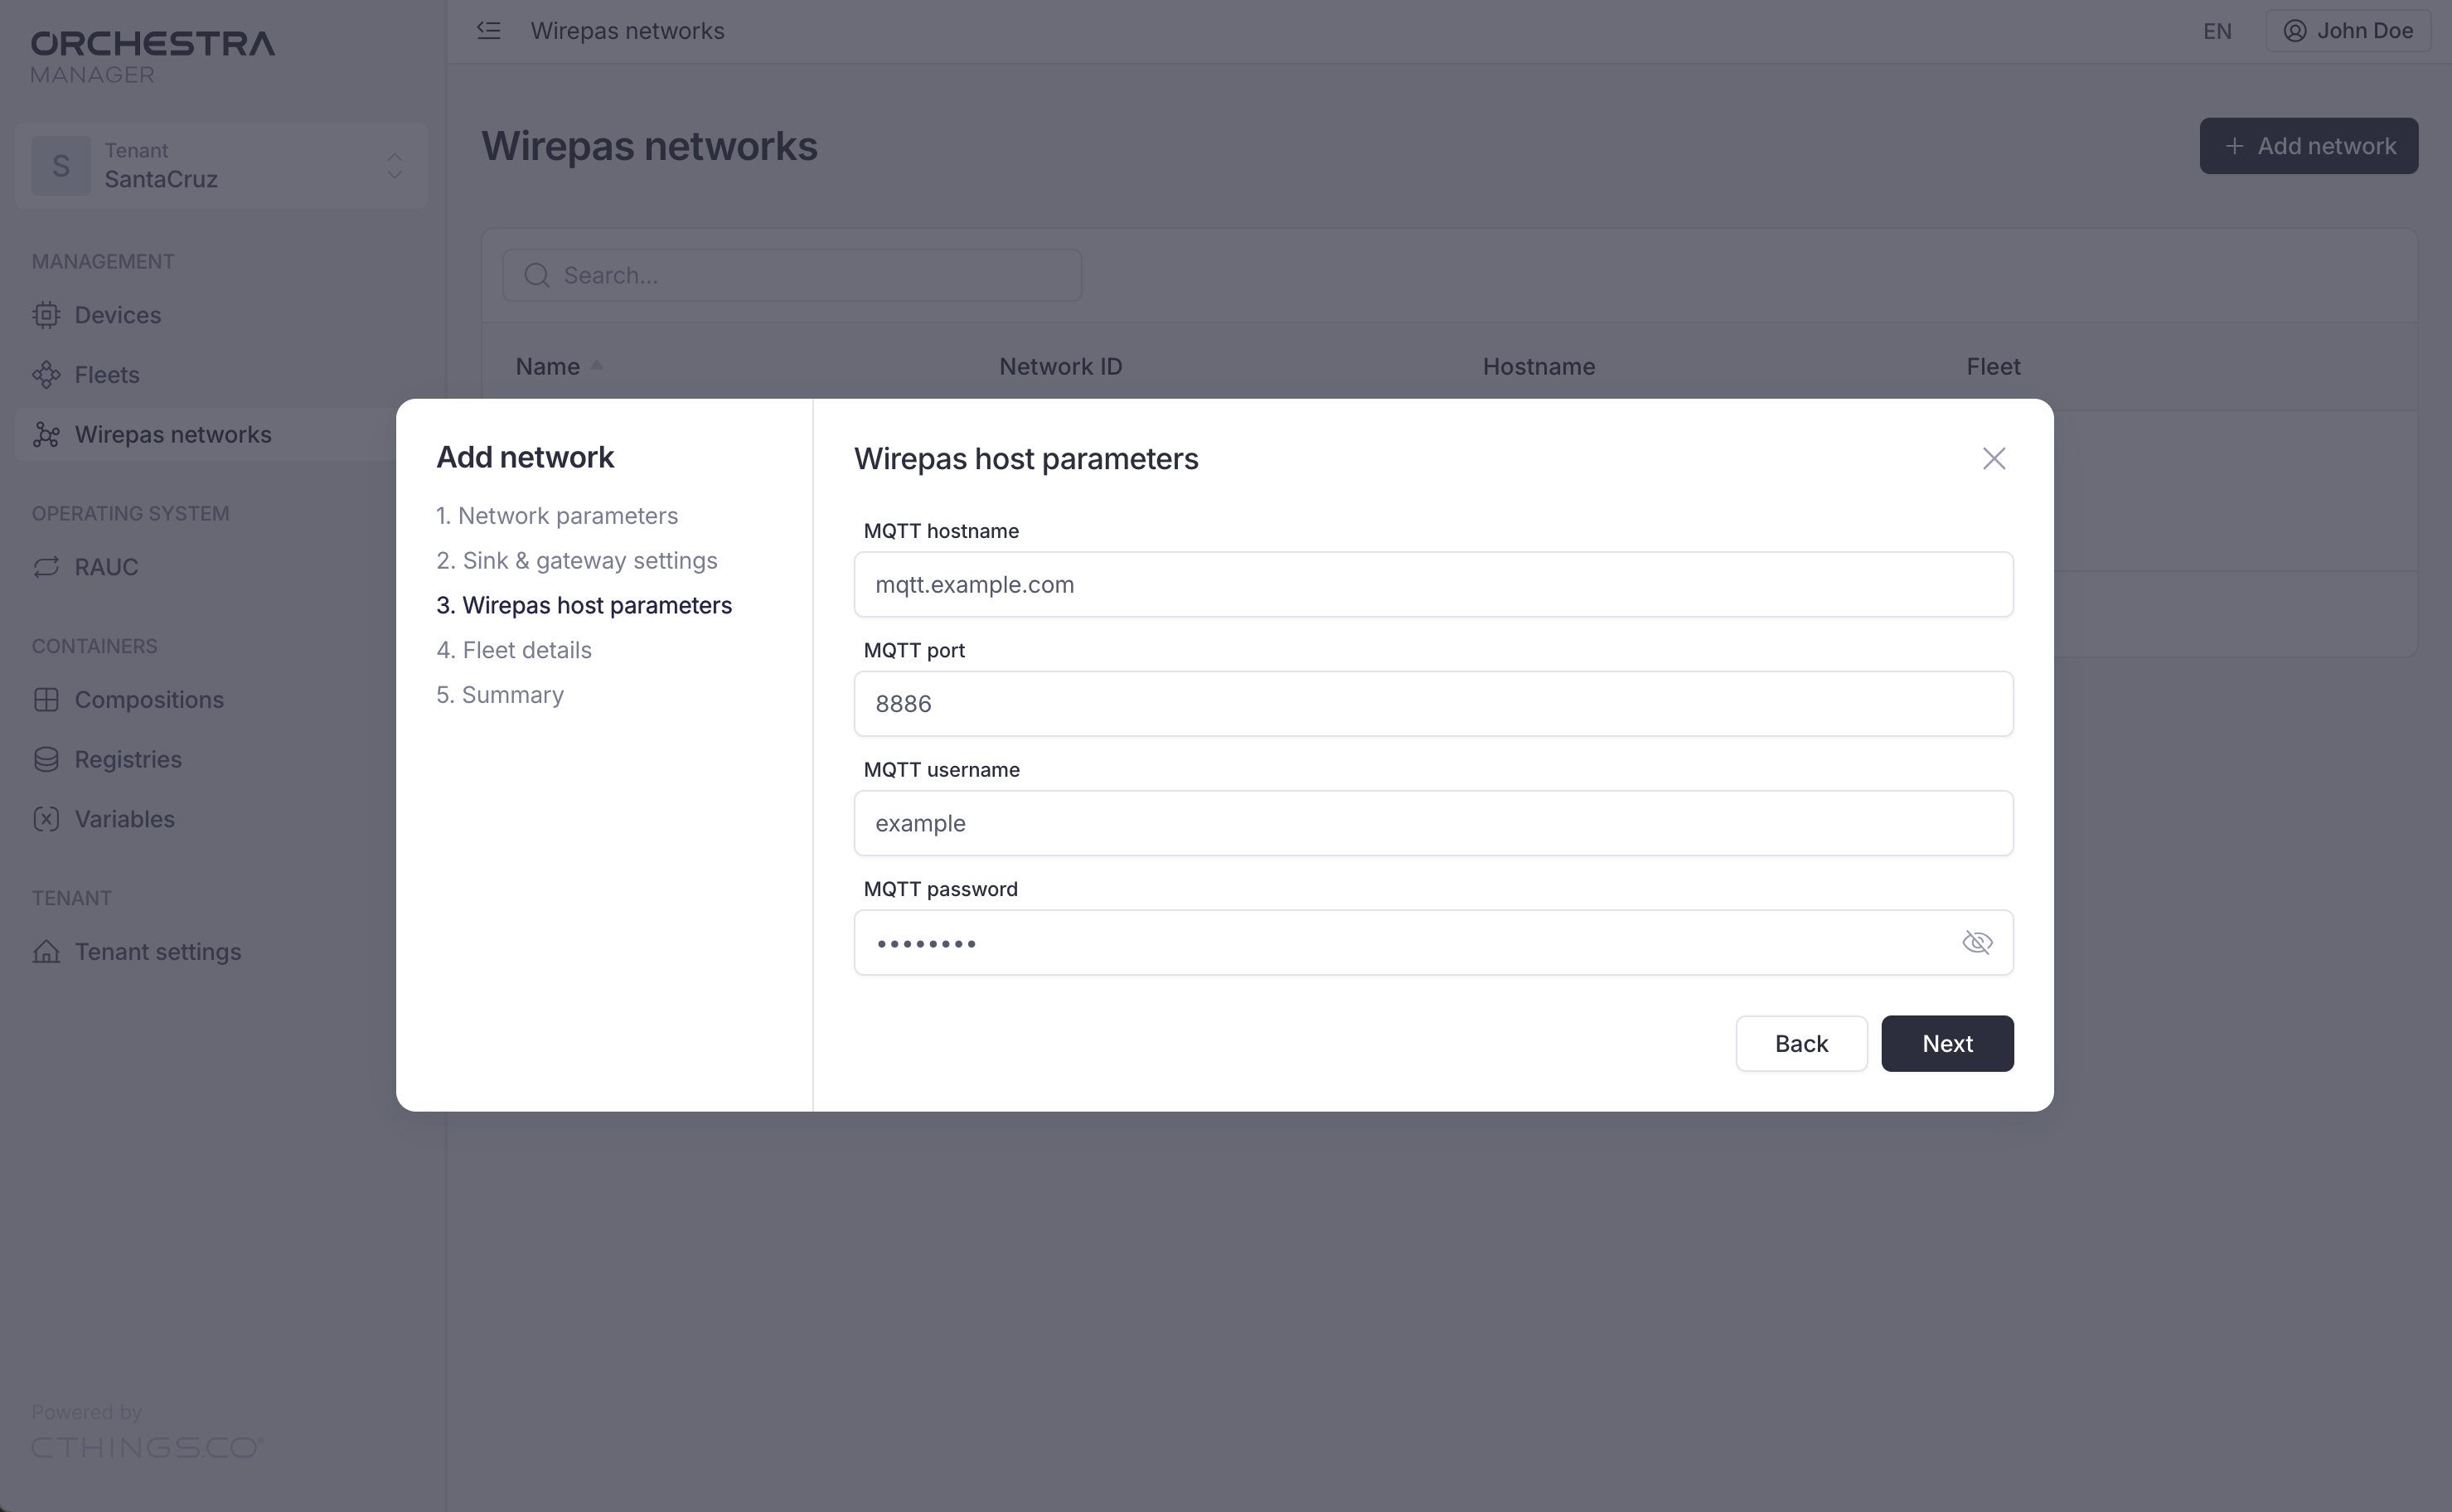
In the Wirepas host parameters step, add the MQTT hostname, port, username and password that you gathered in Before you start.
Warning
Providing incorrect data may lead to a gateway that fully works but does not send any information back to the broker.
Select a fleet
In the Fleet details step:
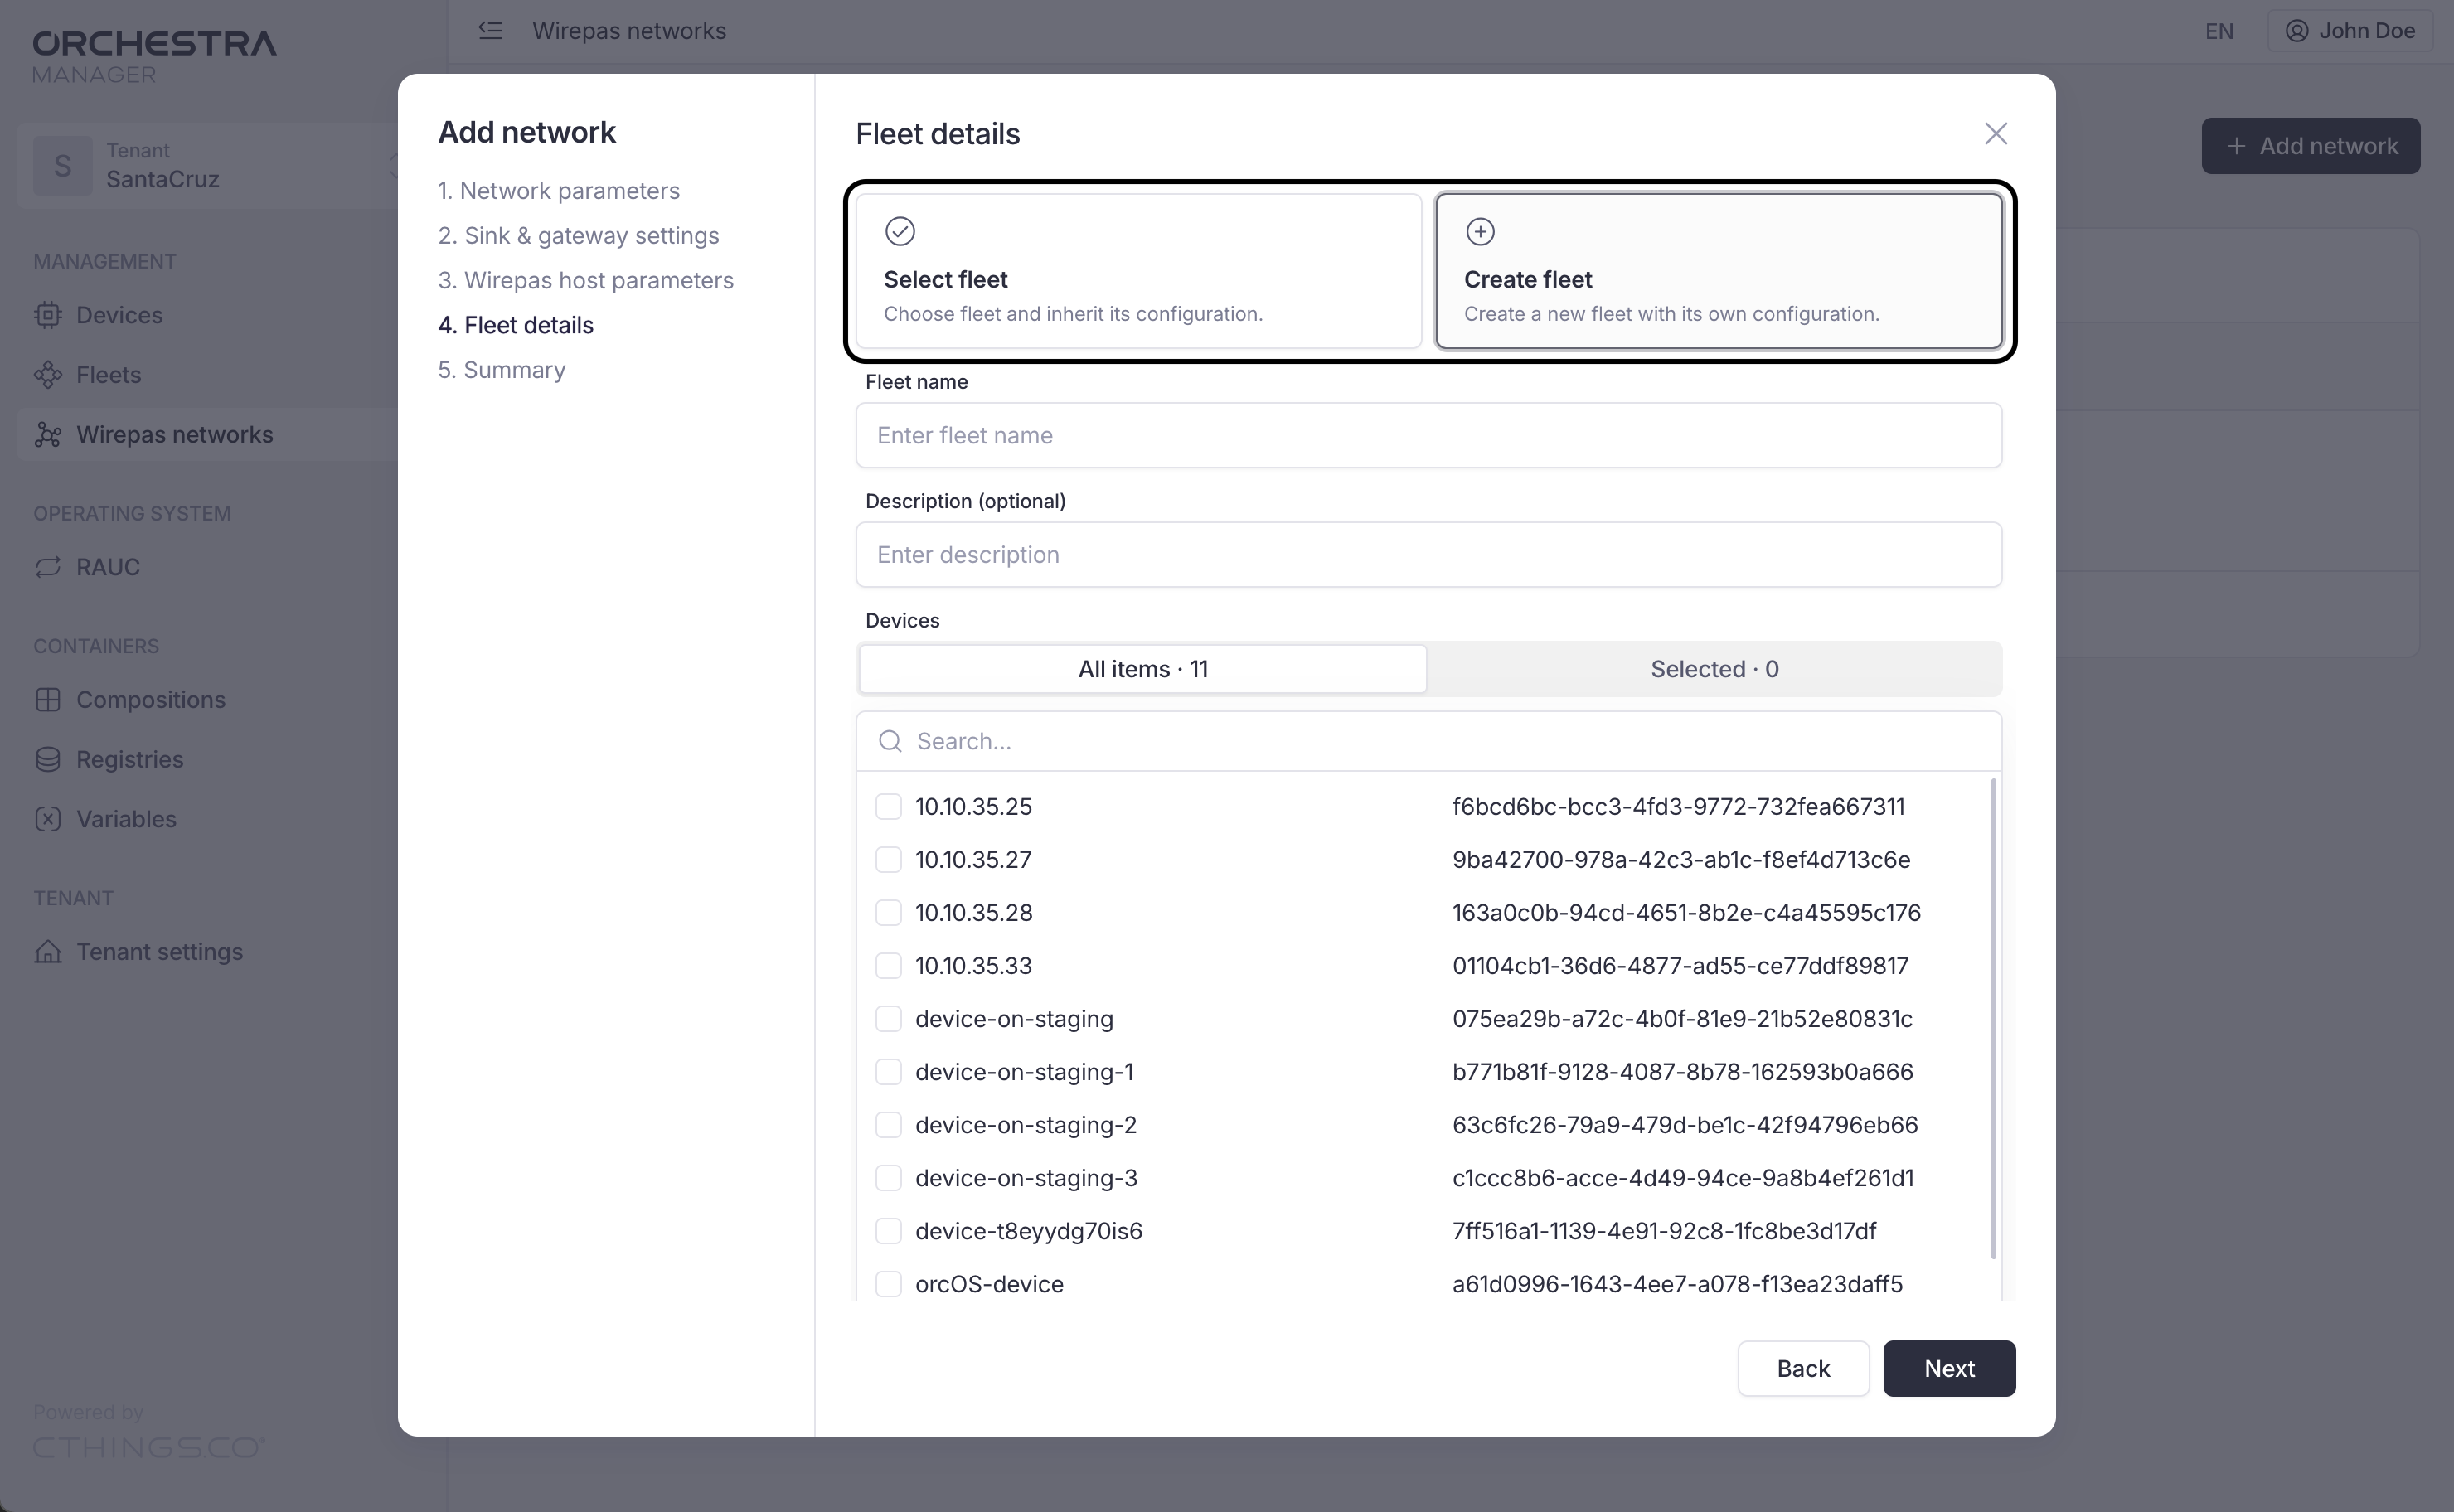
If you already have a fleet with devices that should run your Wirepas network application:
Select this fleet from the dropdown menu.
Click the Next button.
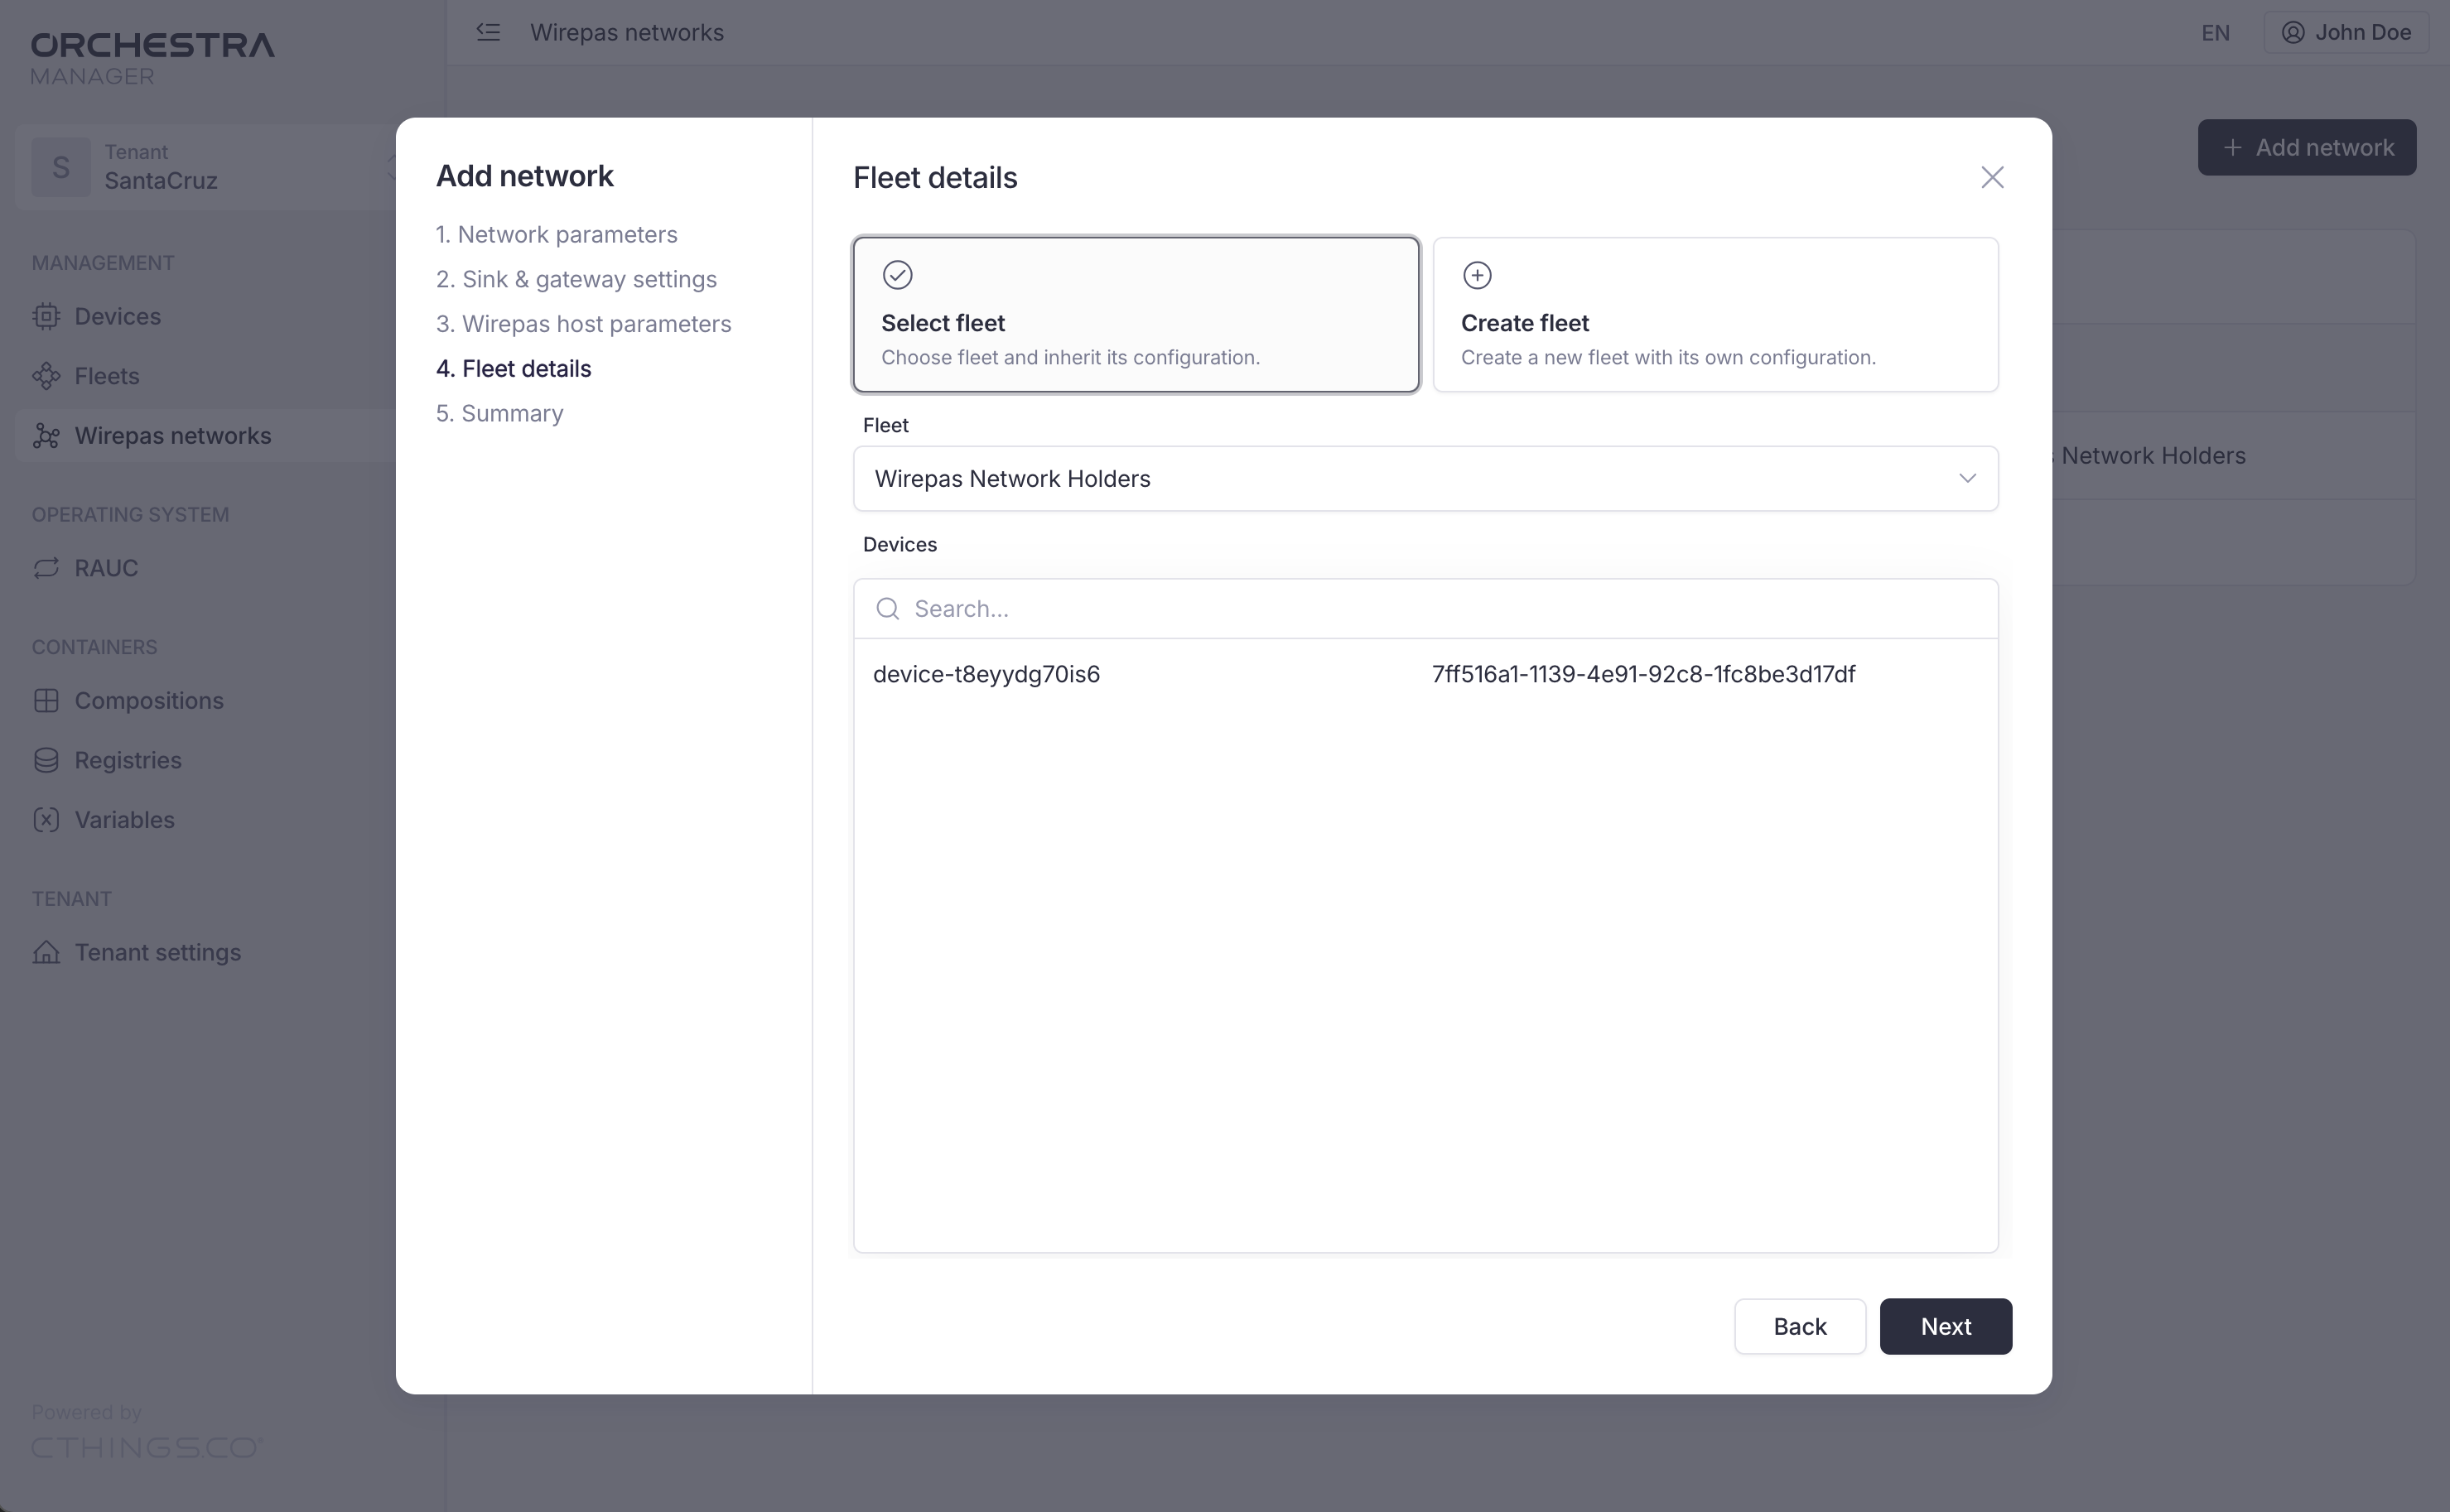
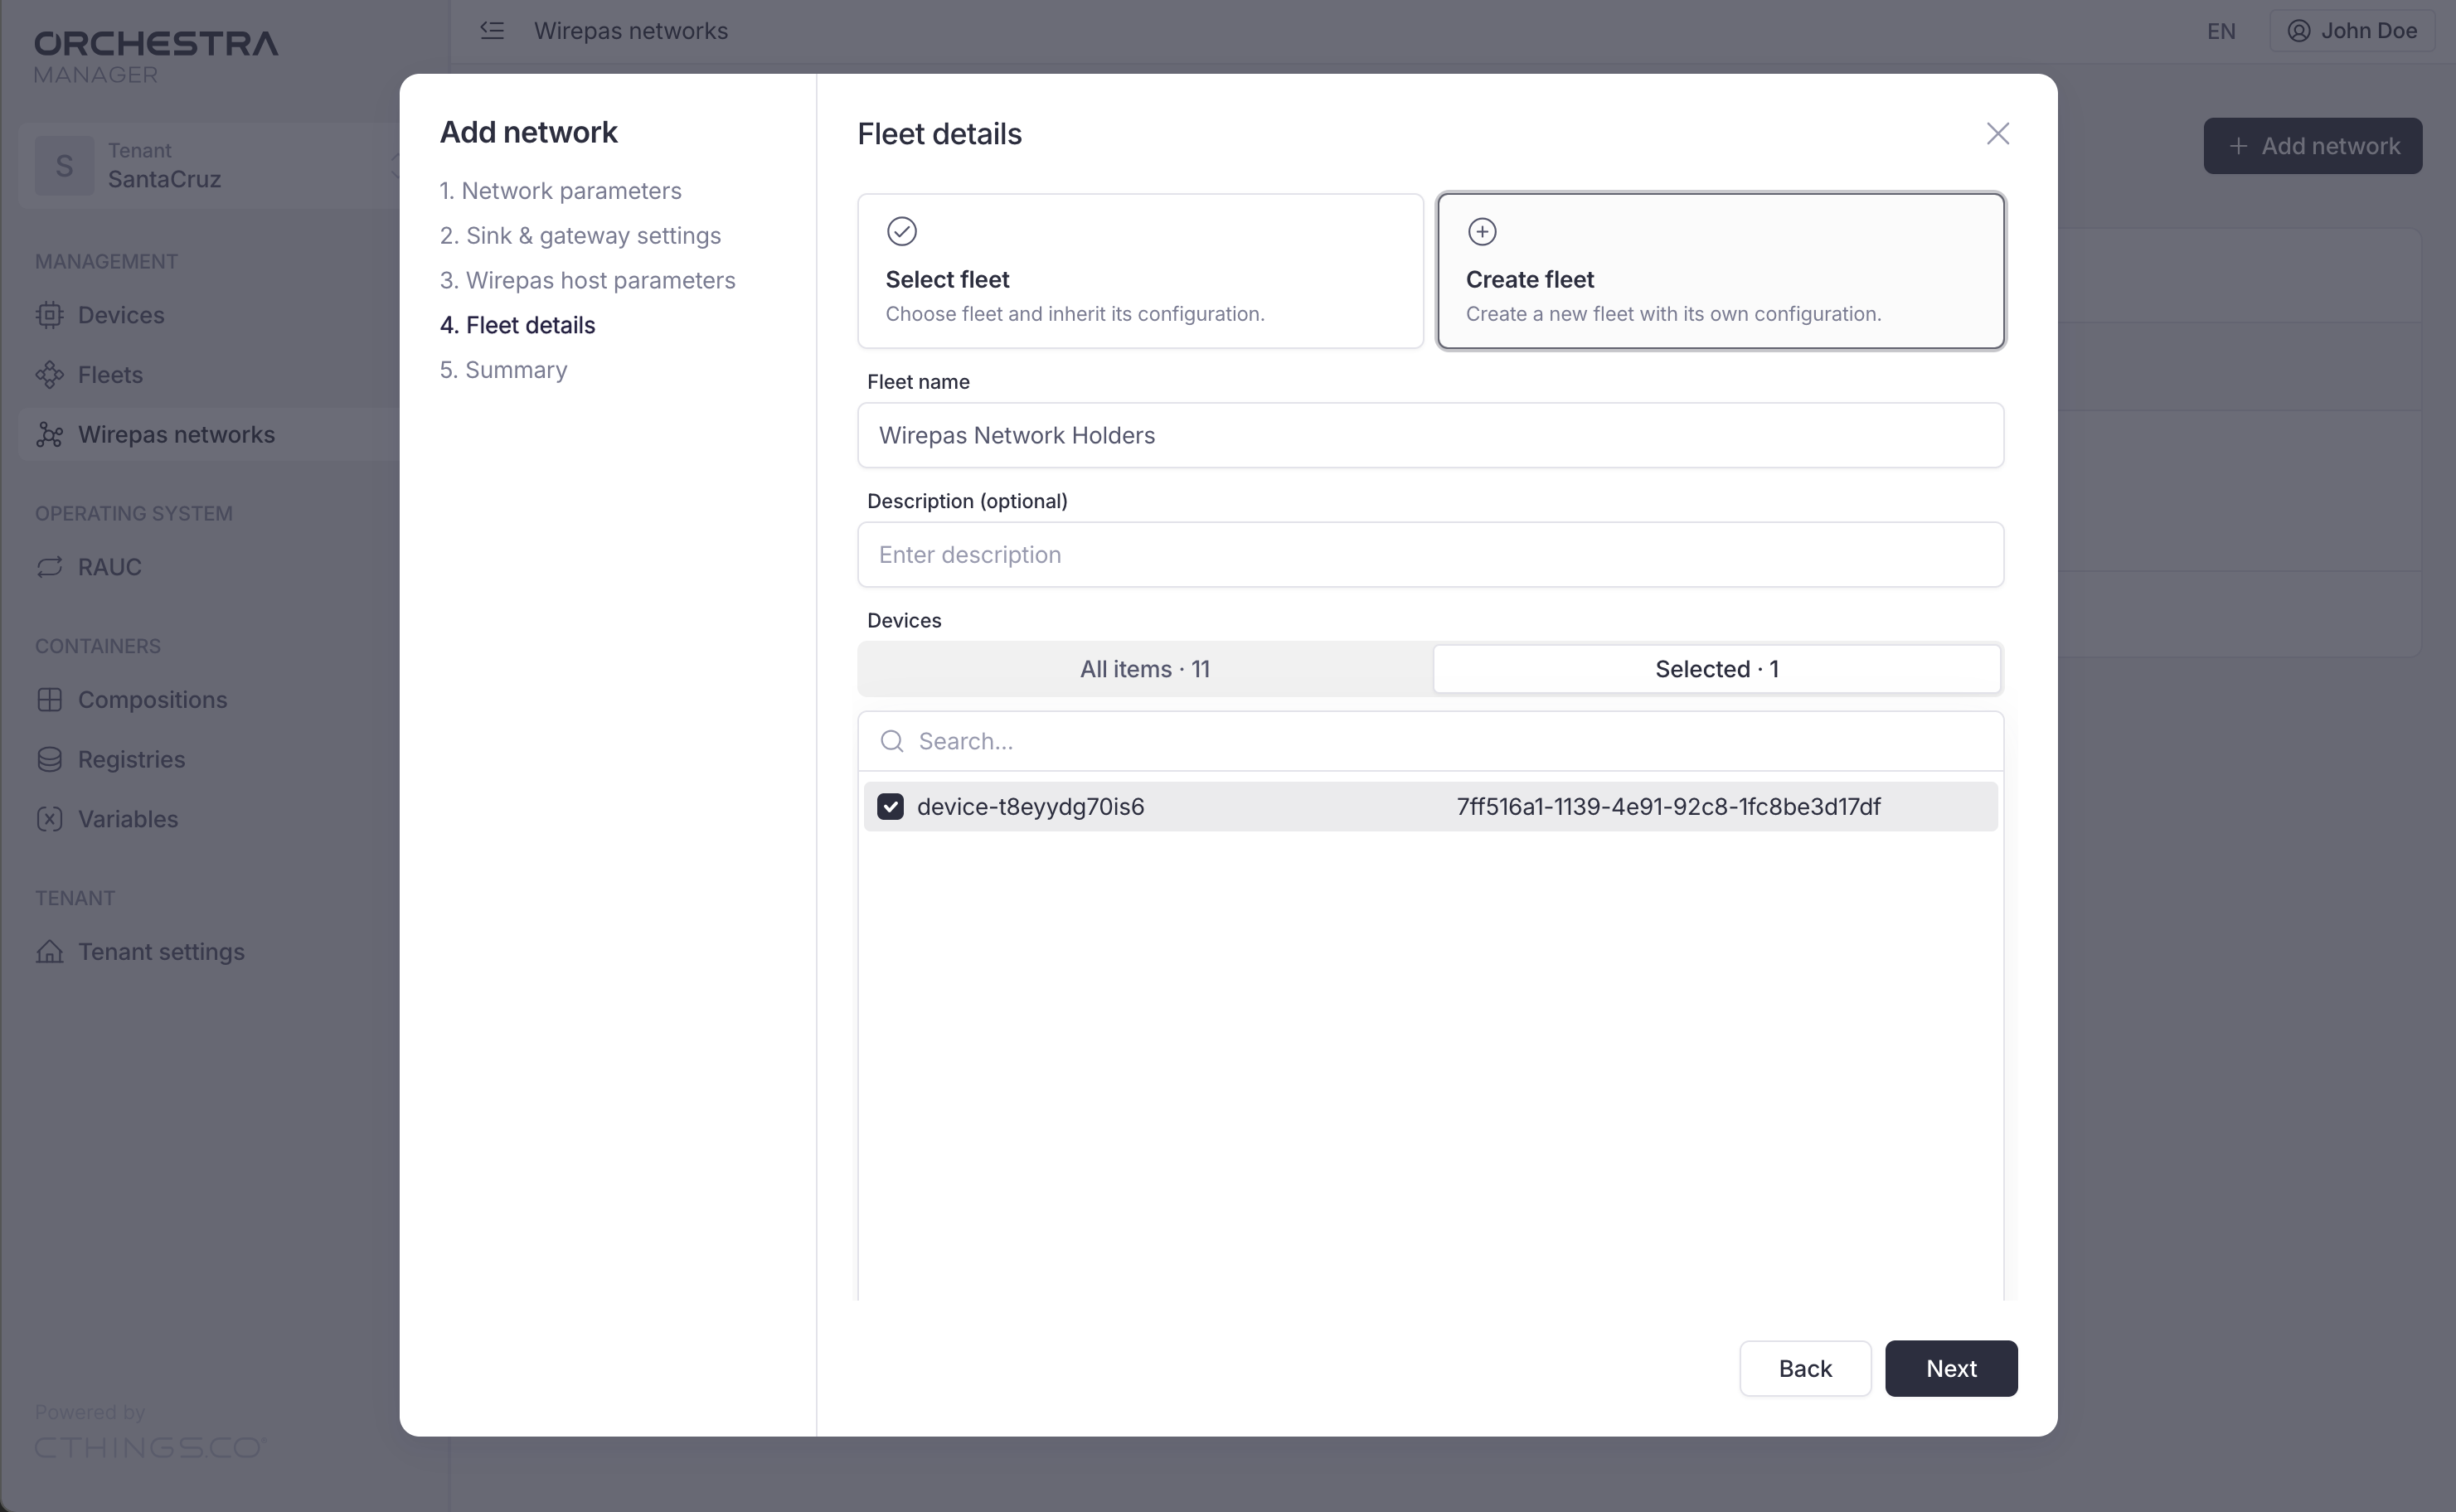
If you onboarded devices but did not create the fleet:
Click Create fleet.
Provide the fleet’s name.
Add devices.
Press Next.
Check the summary
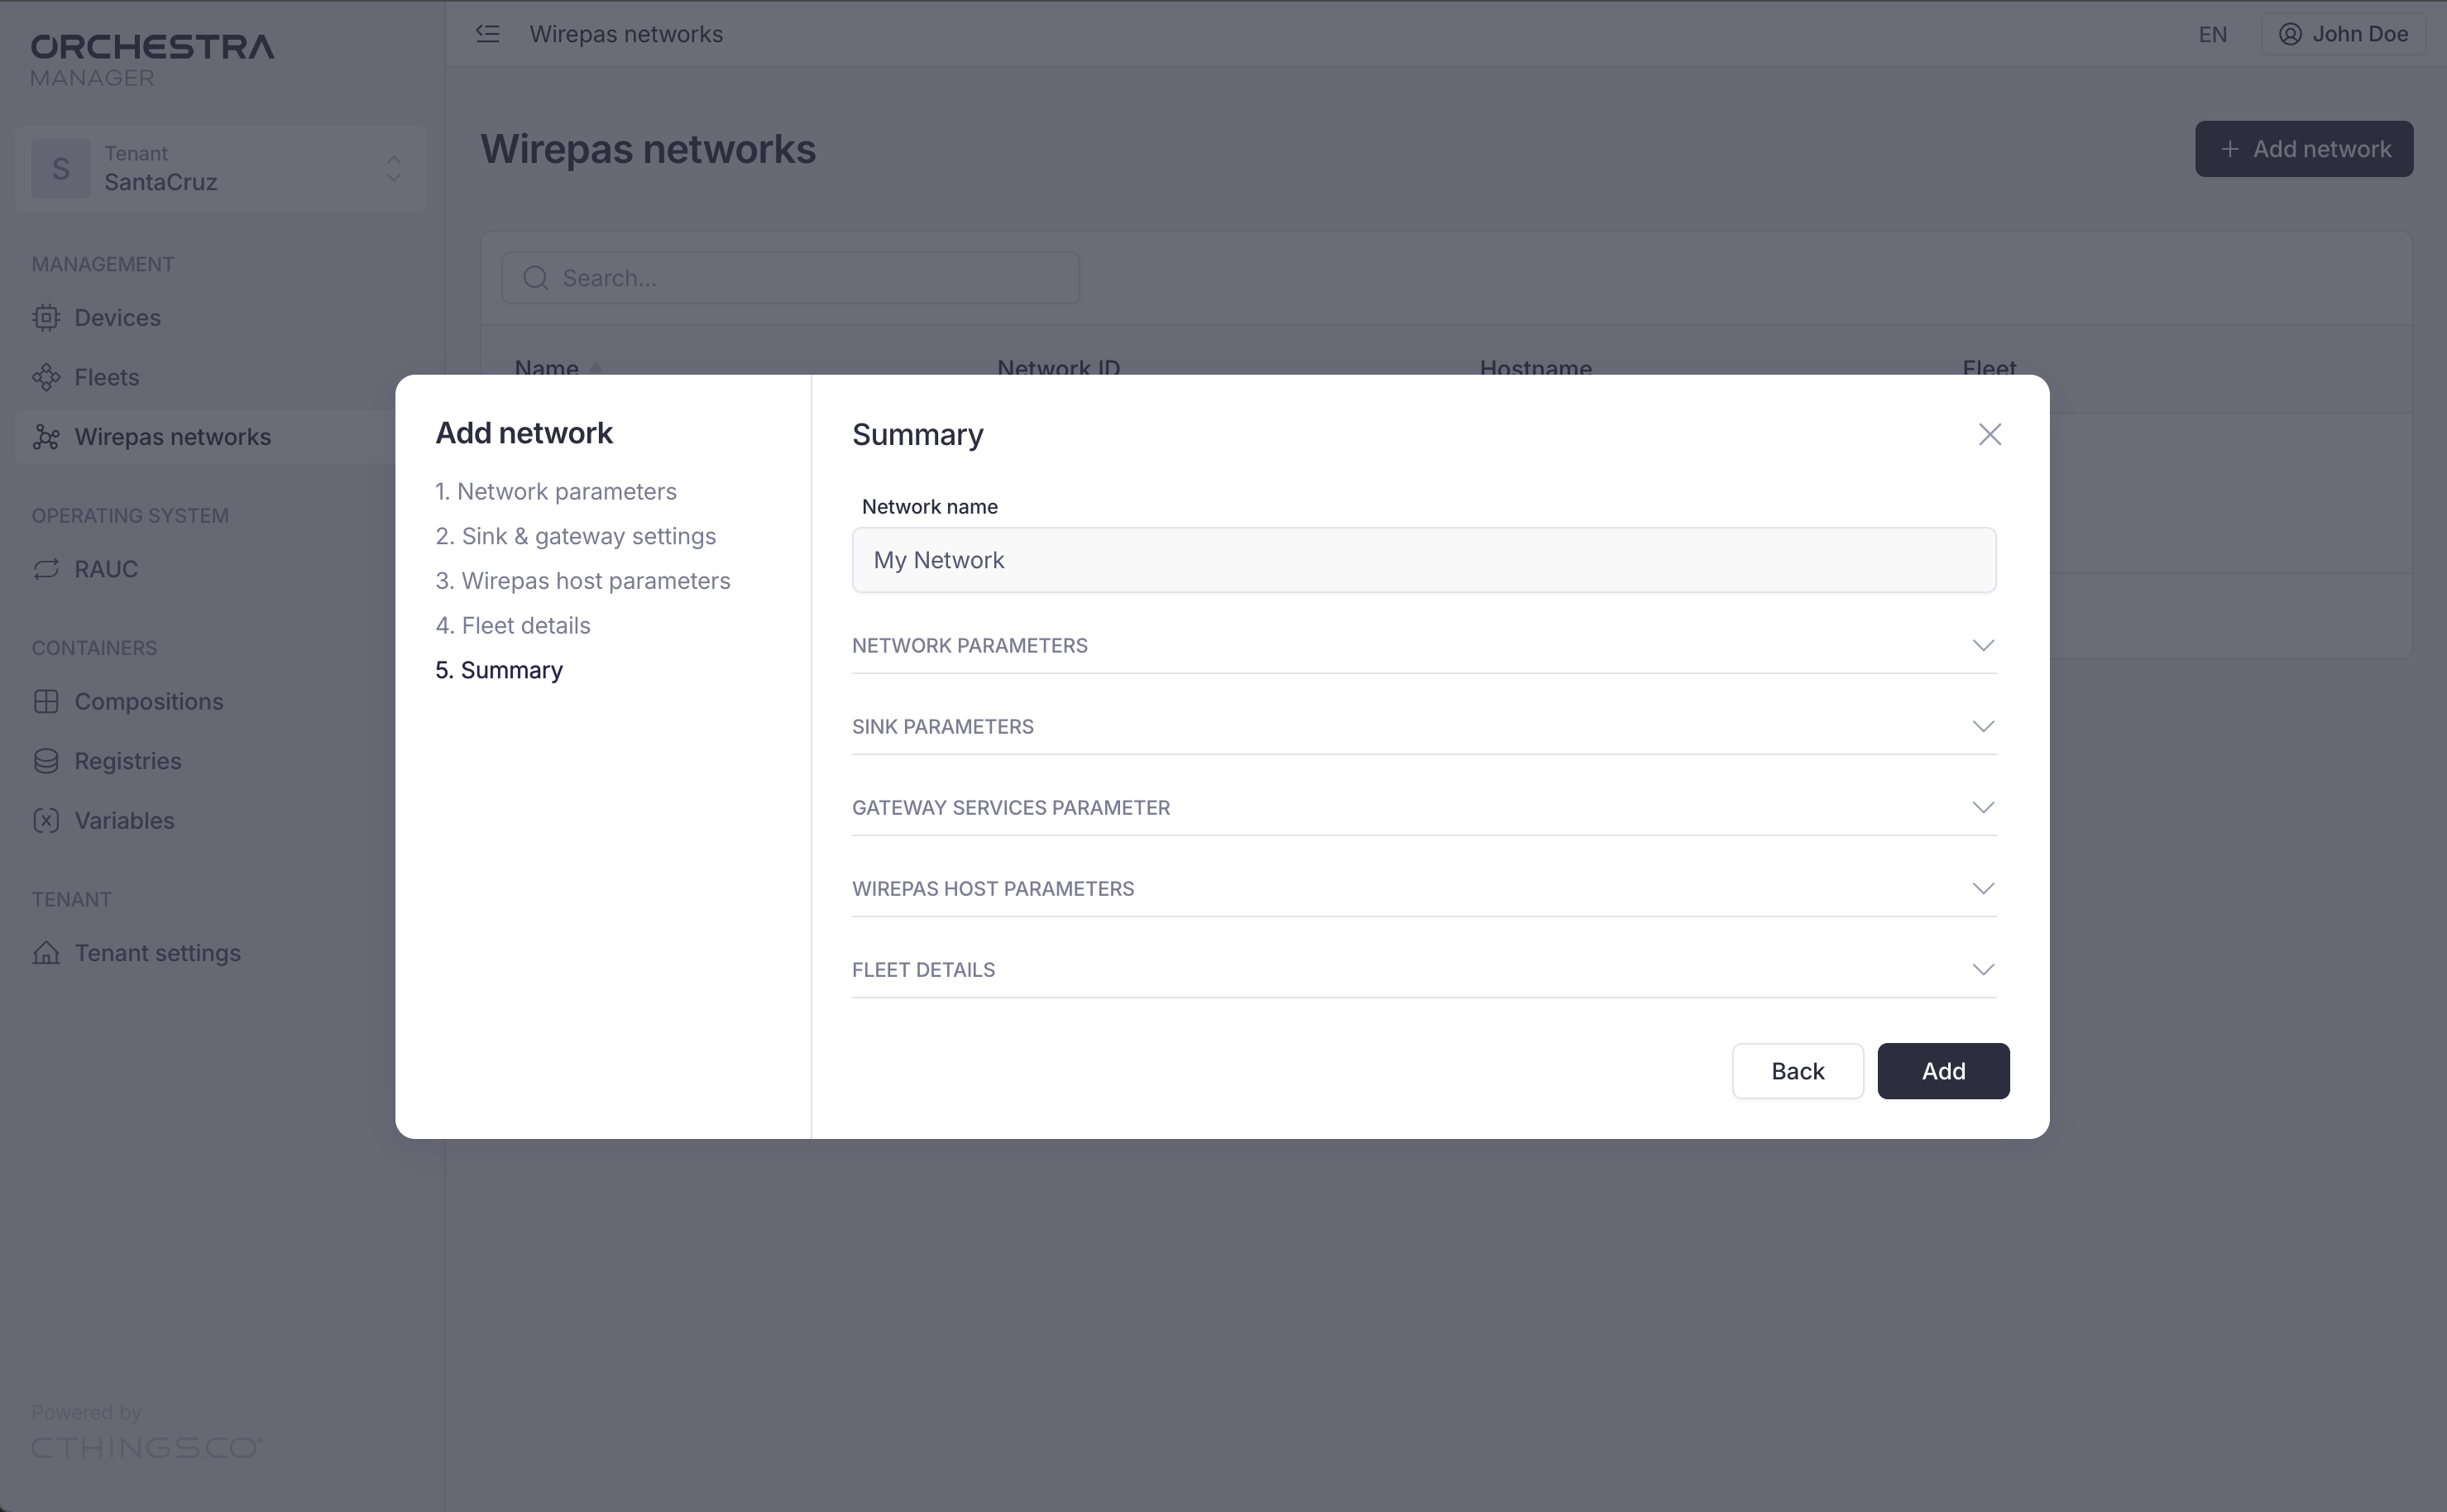
In the Summary step:
Important
Check all values you have provided earlier very carefully. Providing wrong data leads to non-working applications
The network is created.
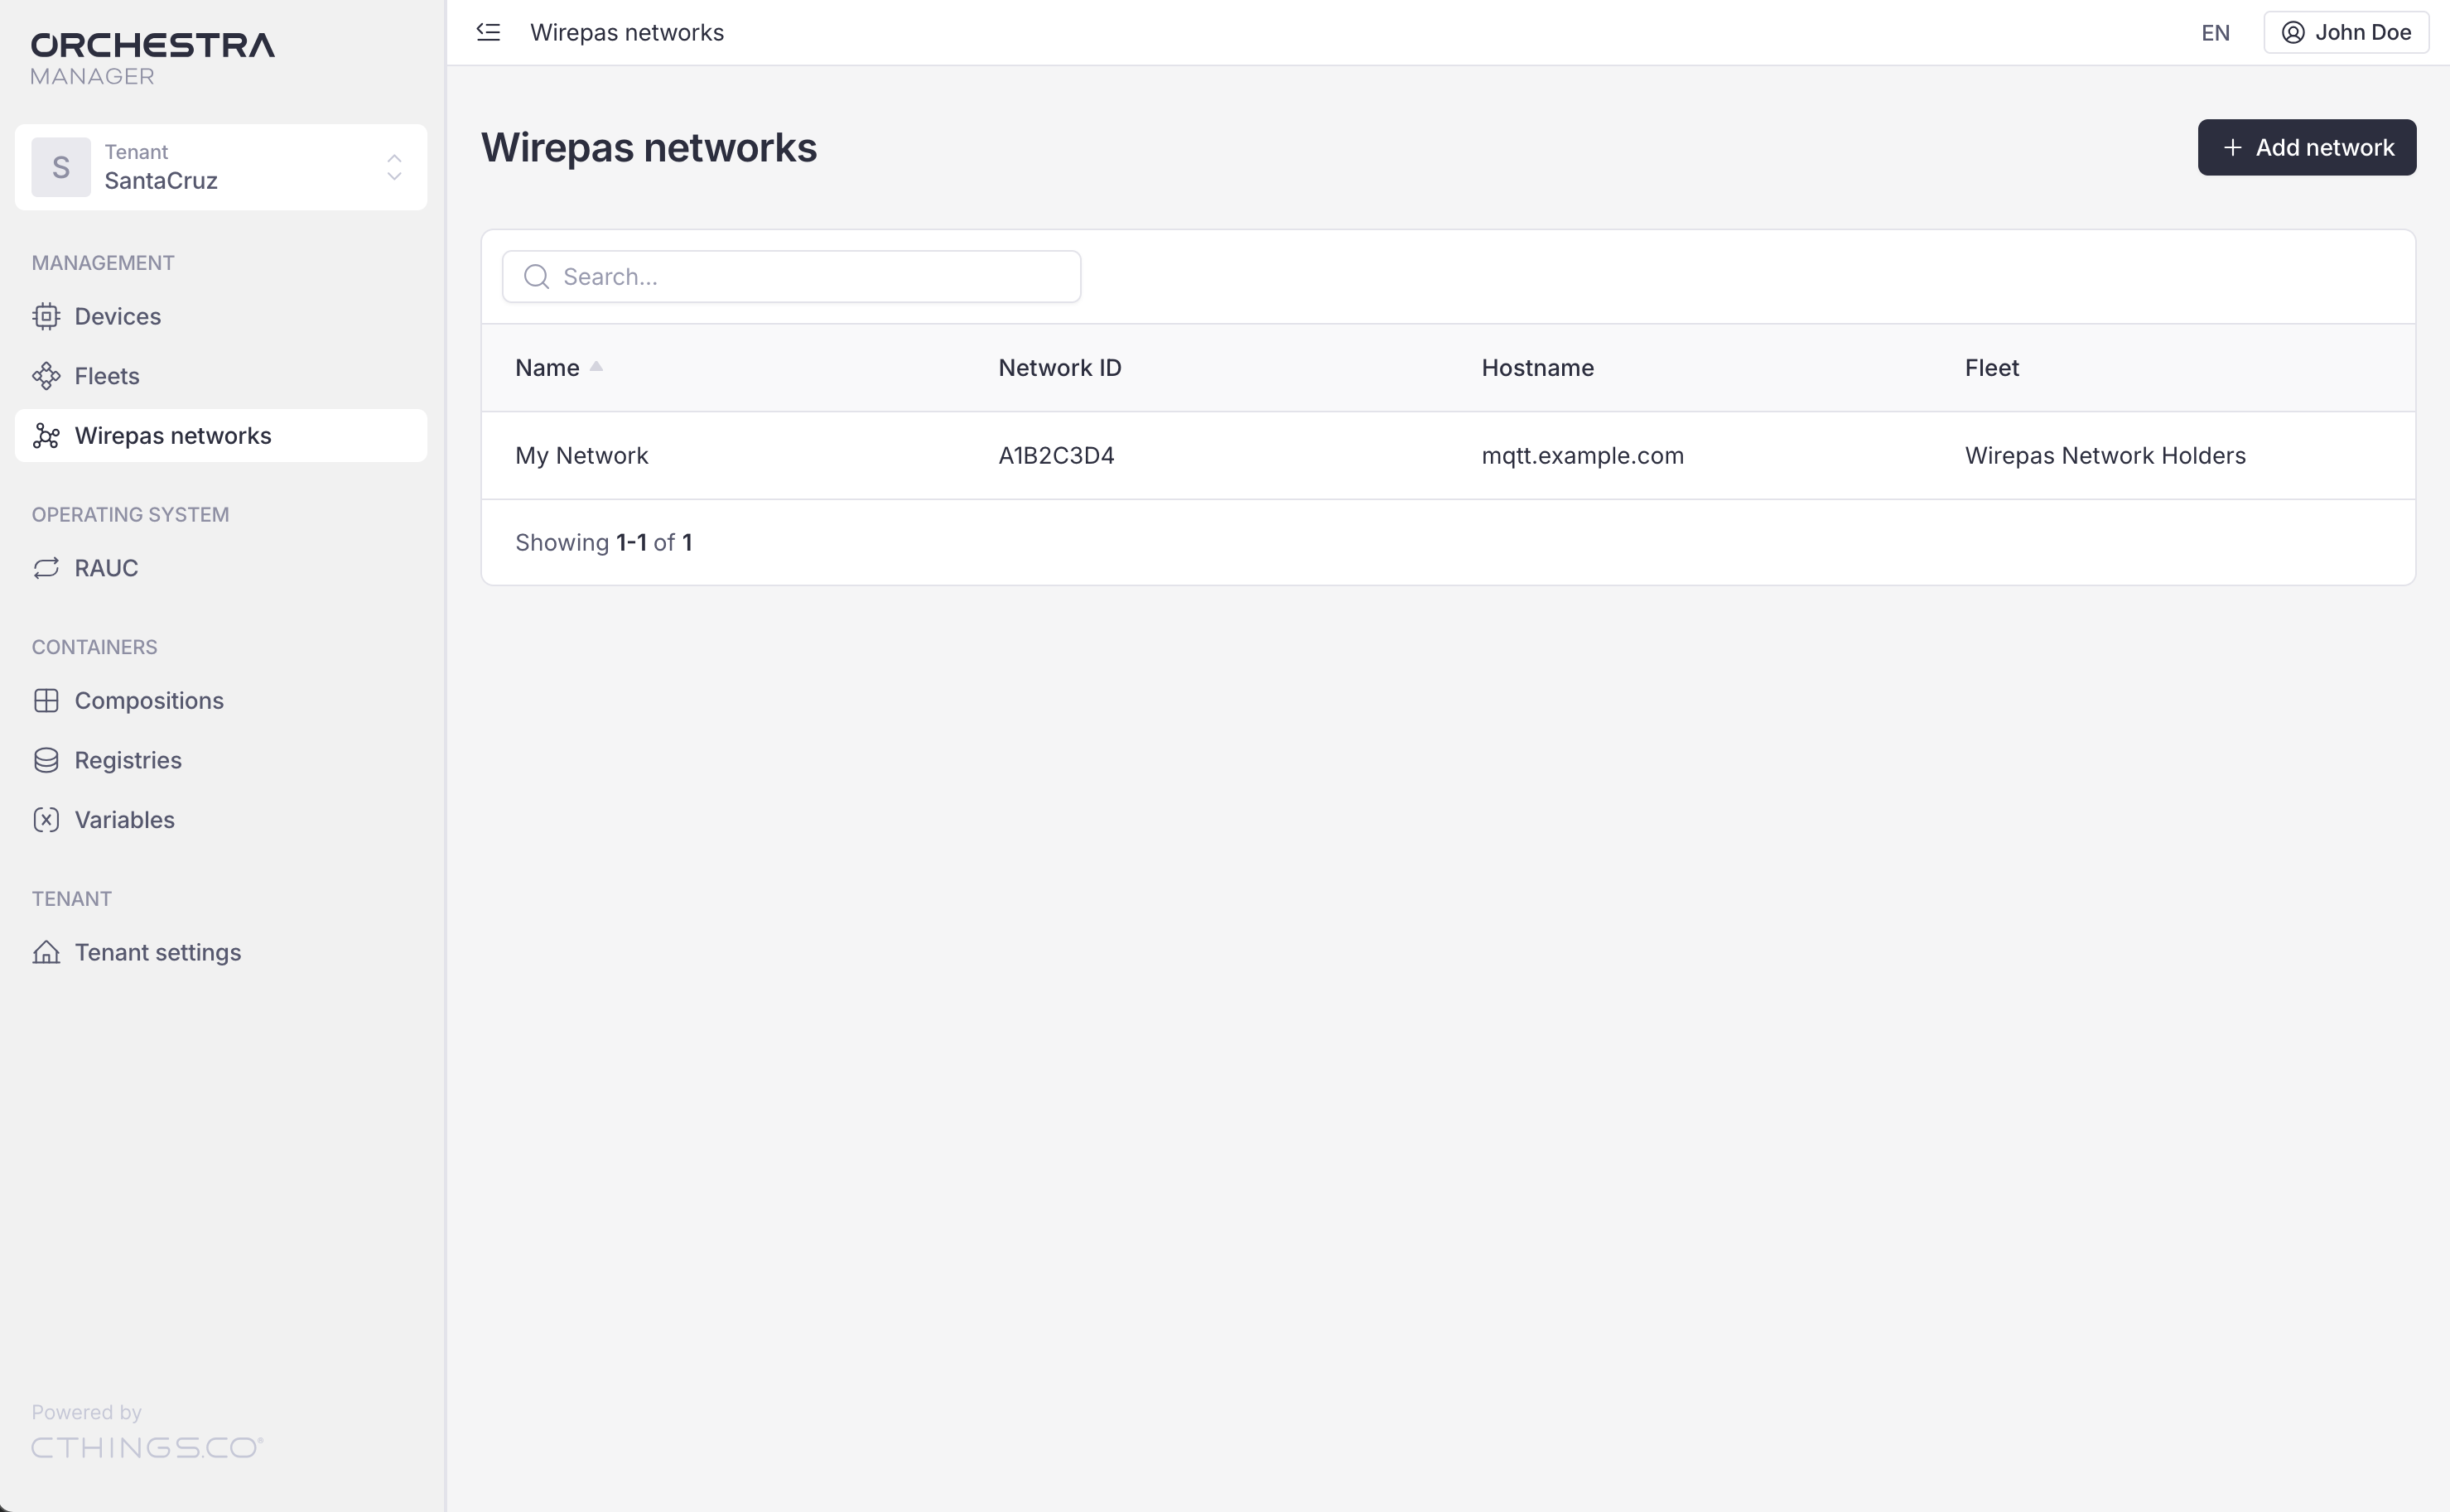
The next step is to deploy this network’s application to your gateway.
Wirepas network composition
The Go to composition button is in the top right corner, as shown in the following figure.
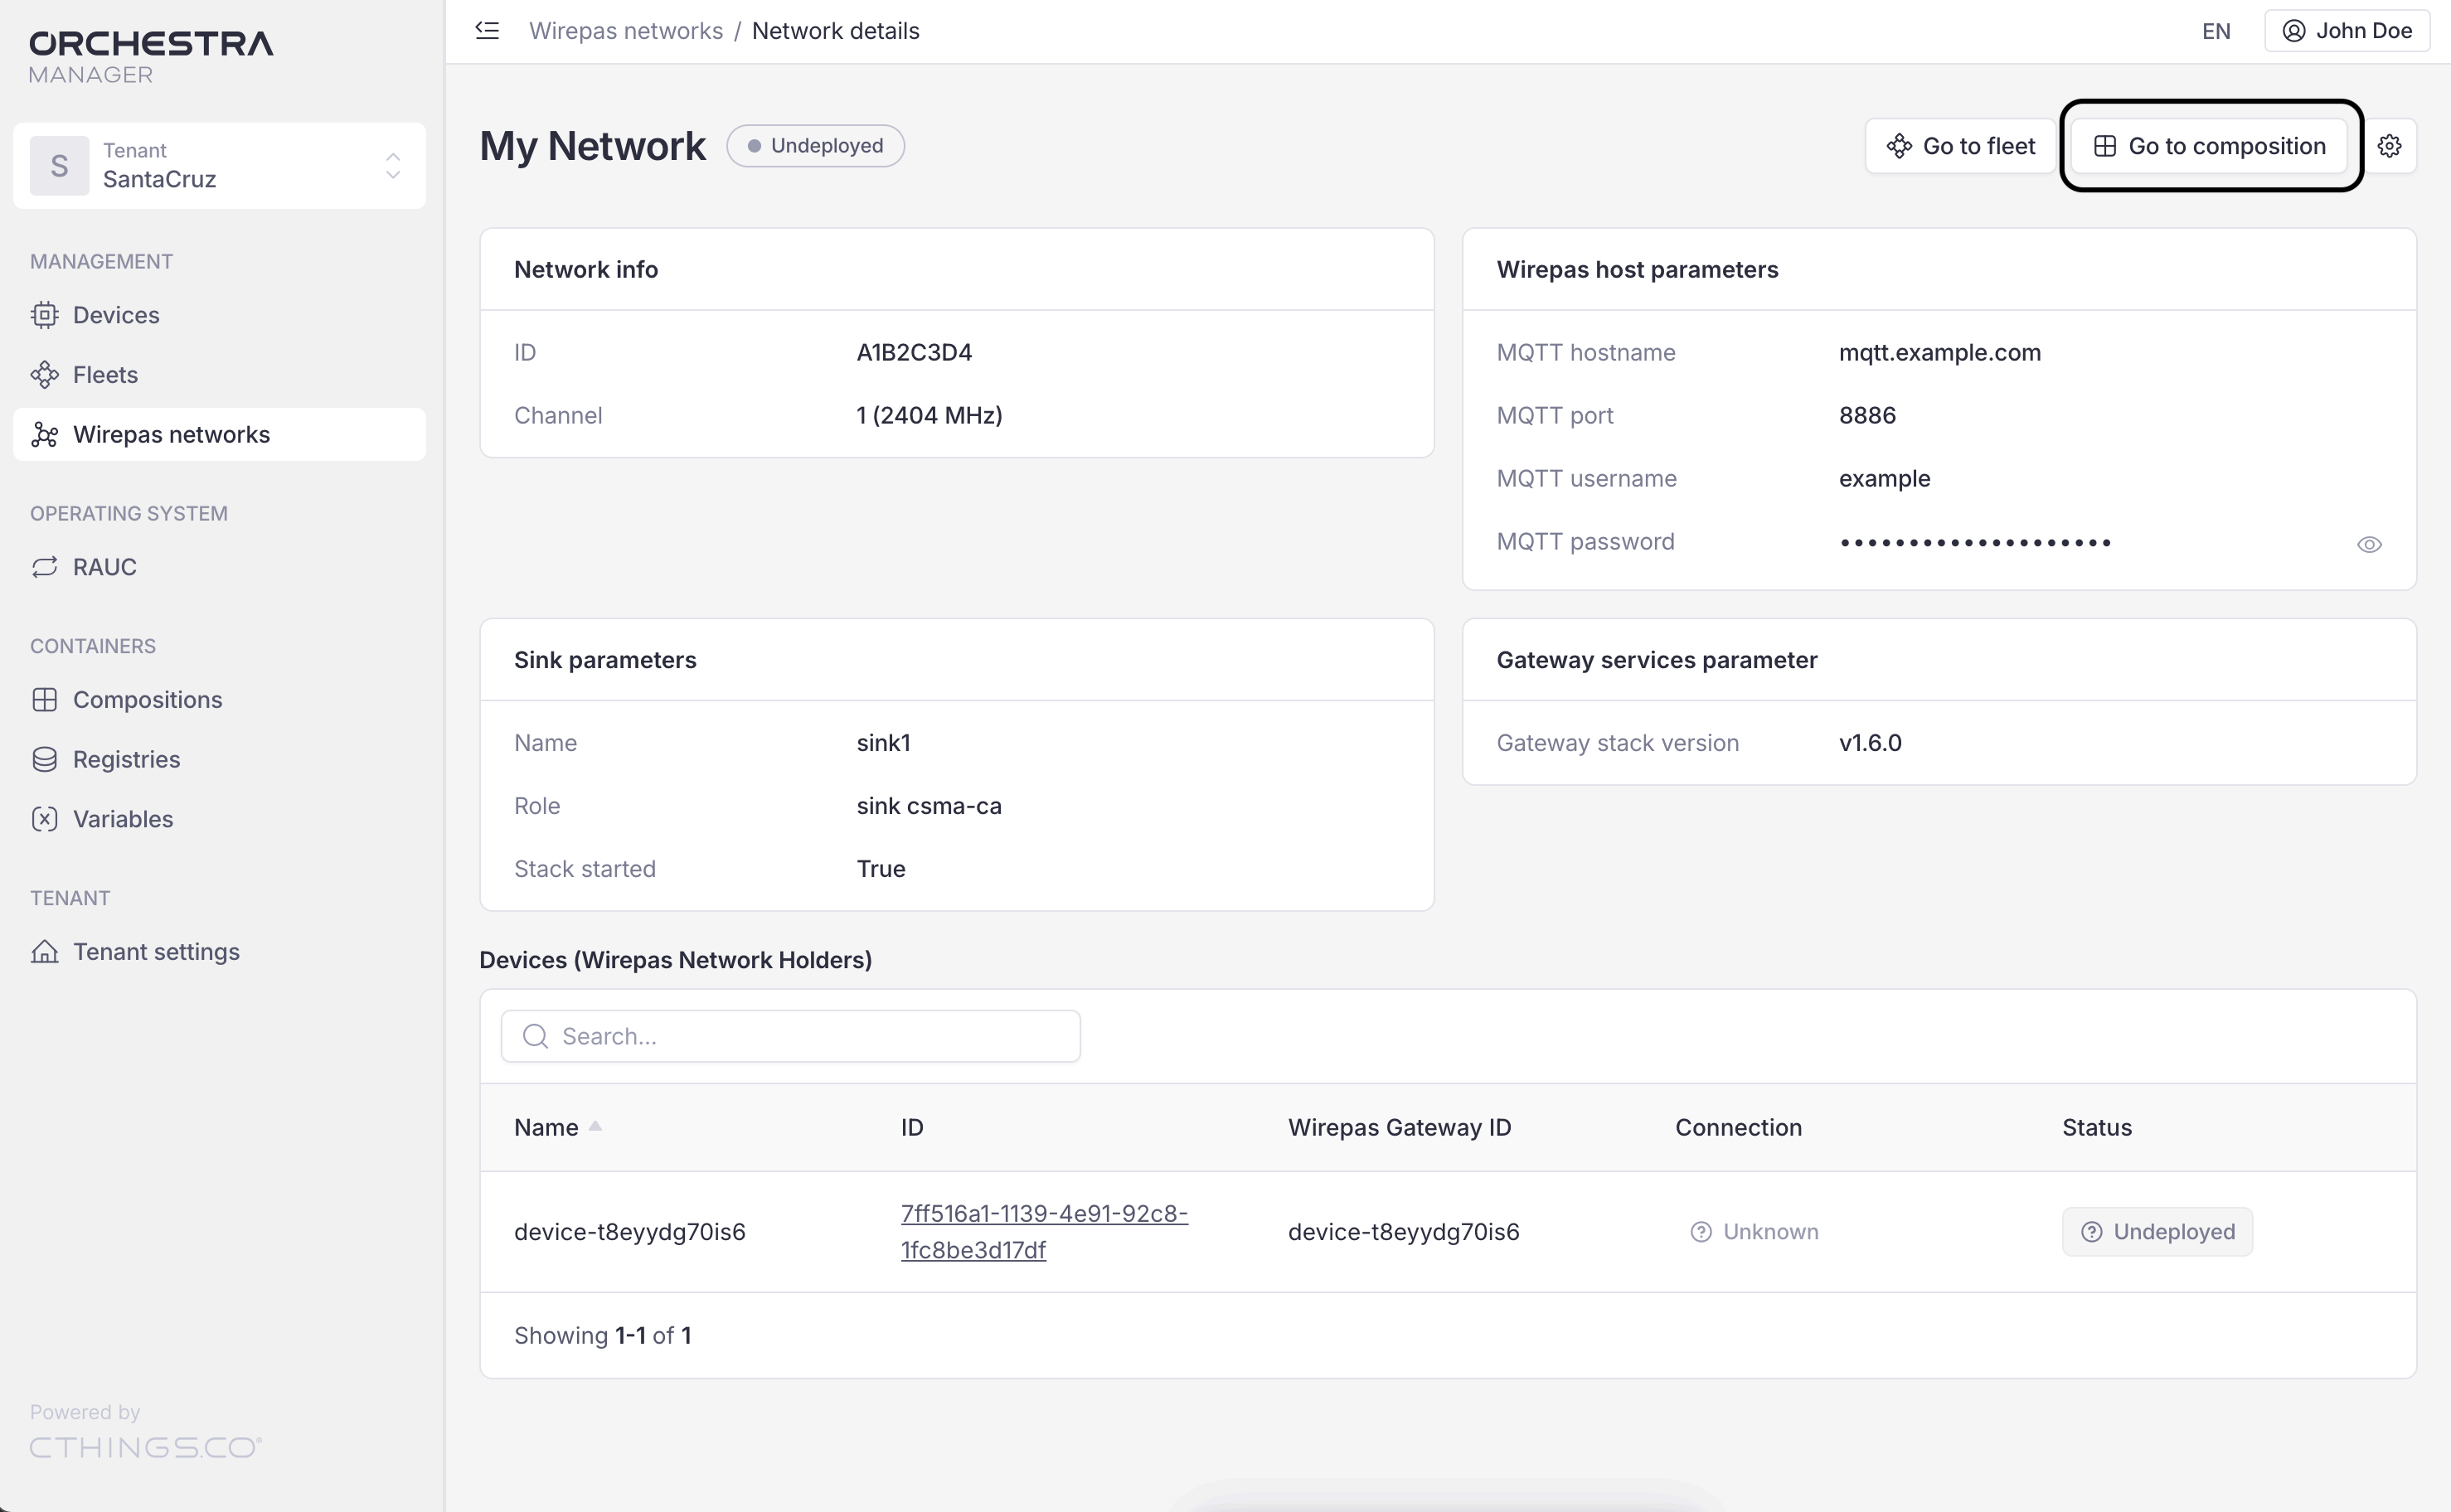
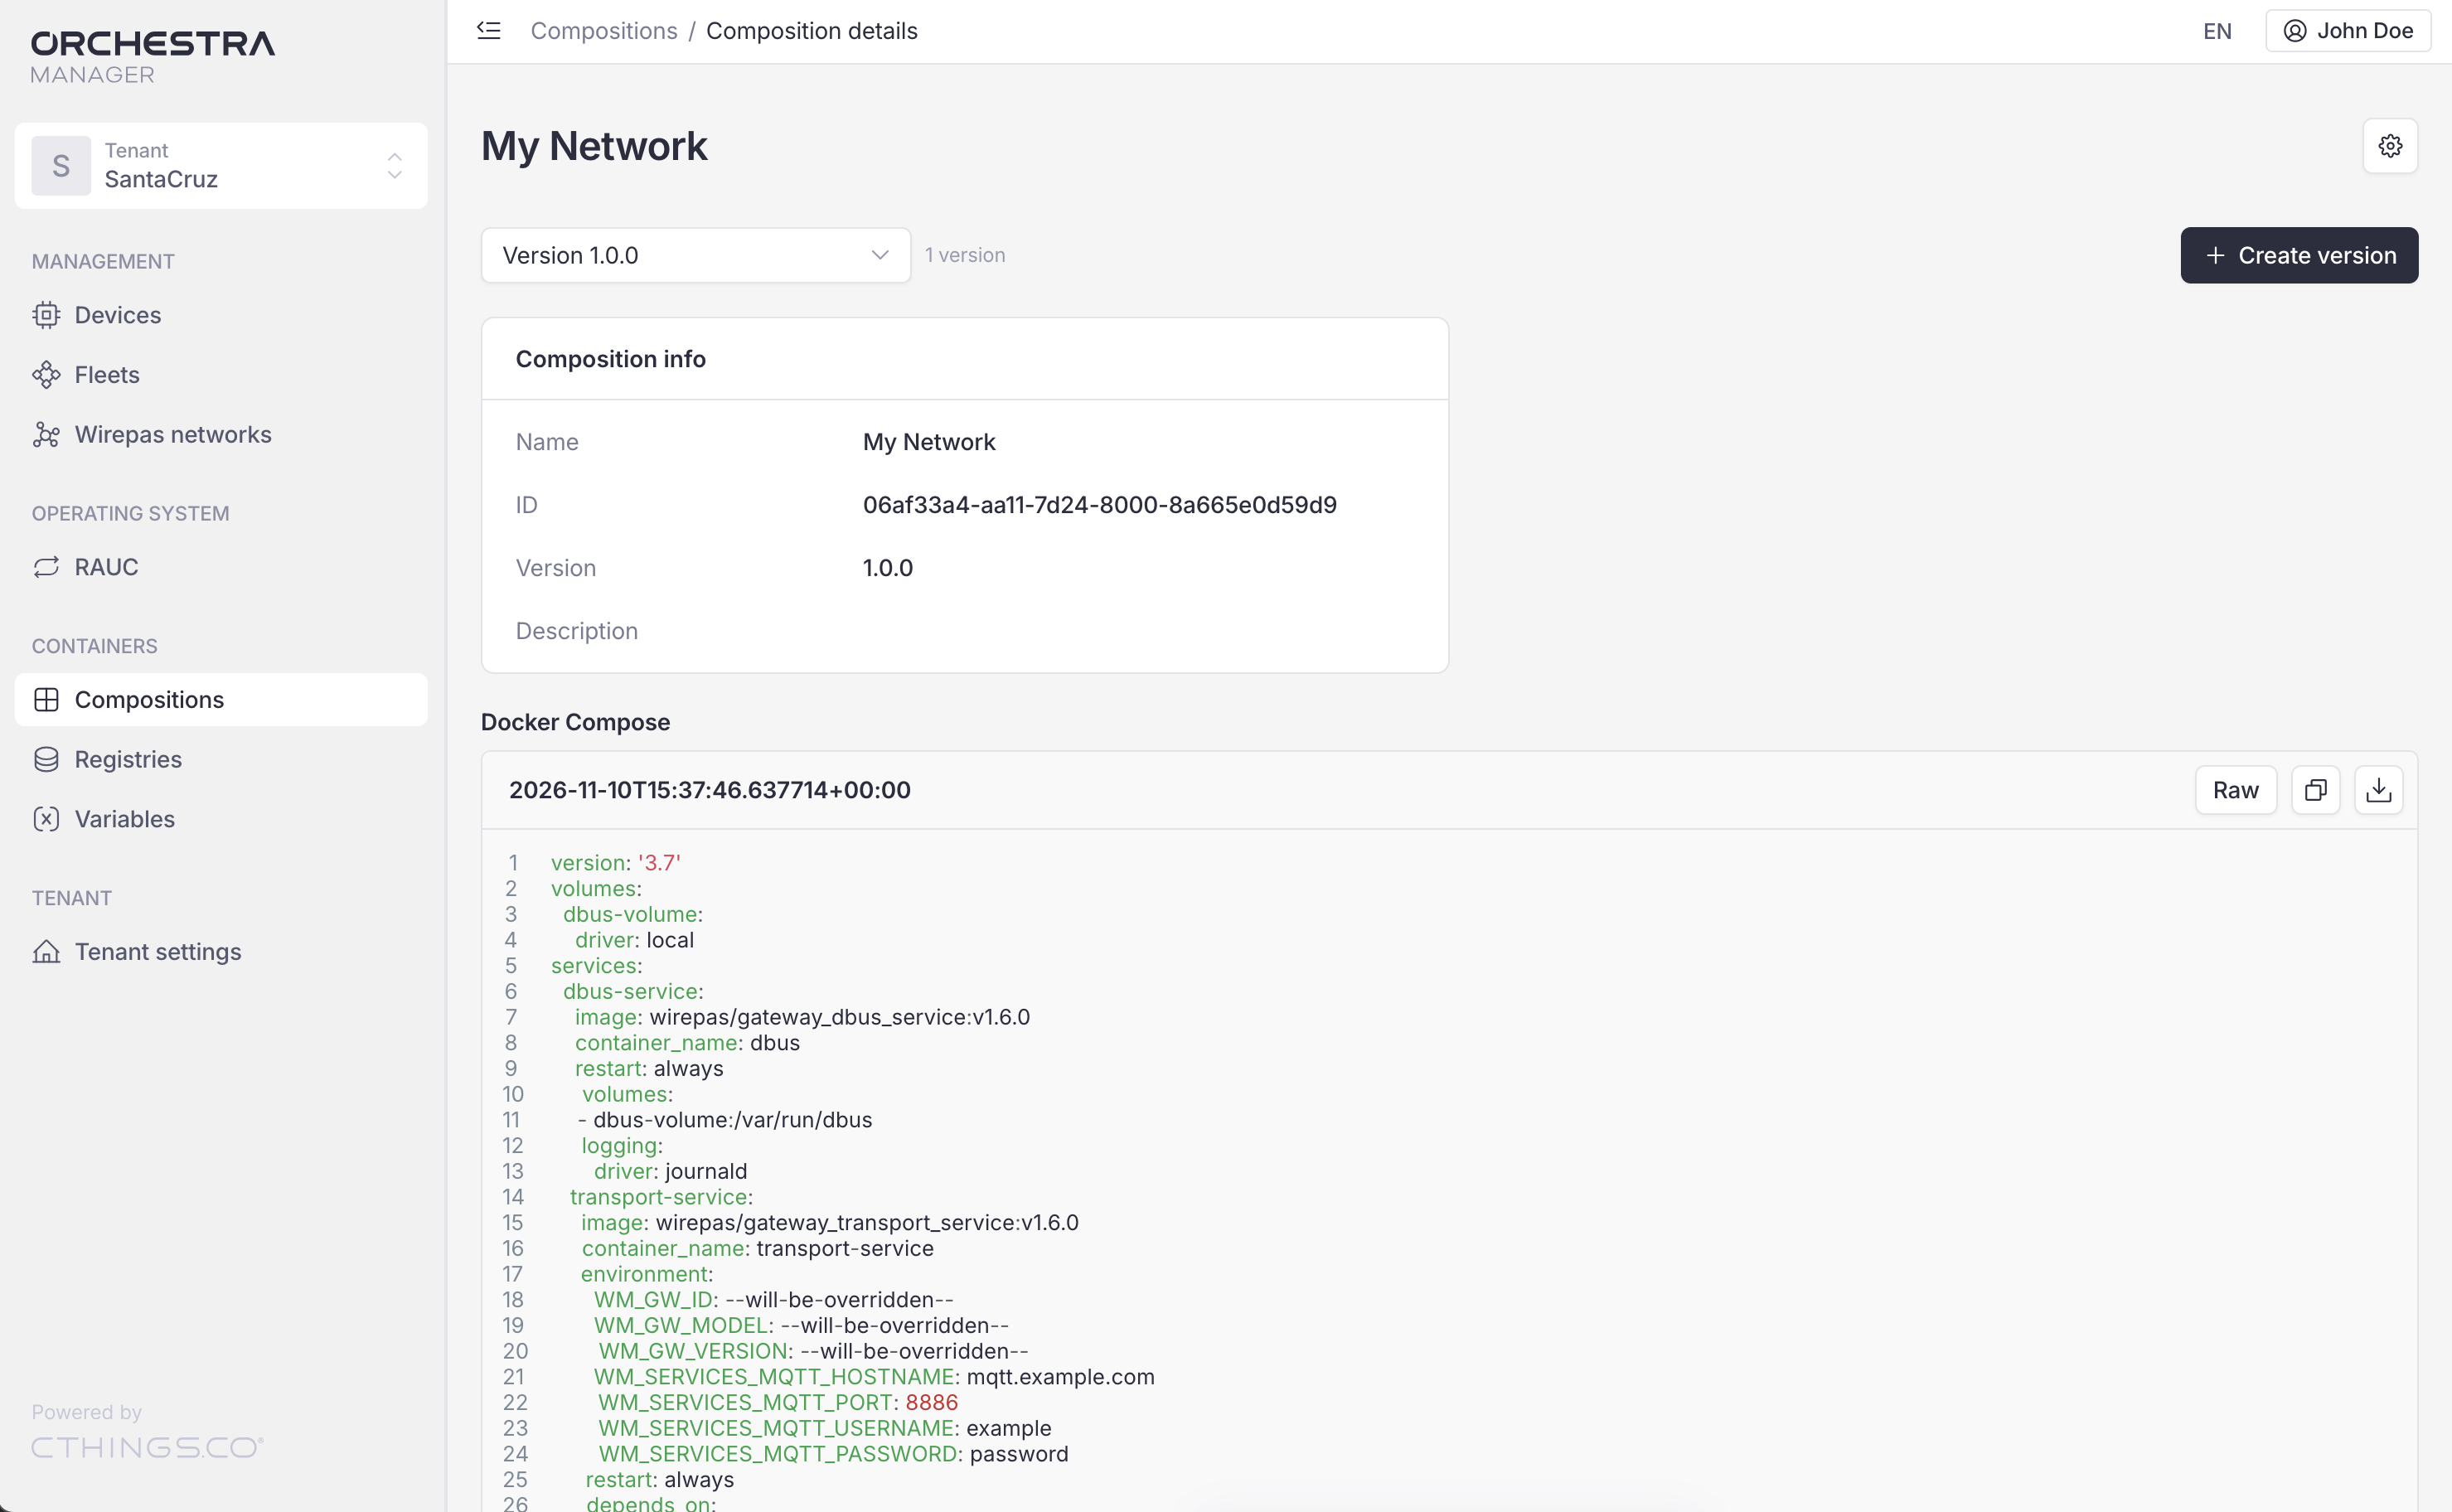
When you were creating the Wirepas network, the composition was automatically created and attached to the fleet. This composition contains four applications:
Application |
Description |
|---|---|
|
A private D-Bus message bus the other services talk over. |
|
Drives the USB sink over UART and exposes it on D-Bus. |
|
The MQTT client. Uses the MQTT credentials you already specified to bridge D-Bus traffic to the broker. |
|
Runs once. It finds the sink. After that, it stops it, writes the node address, role, network ID, channel and keys, then starts the sink again if Start stack after configuration is set to True. |
This composition has the same name as its Wirepas network.
Deploy the network stack
You can deploy the automatically generated composition.
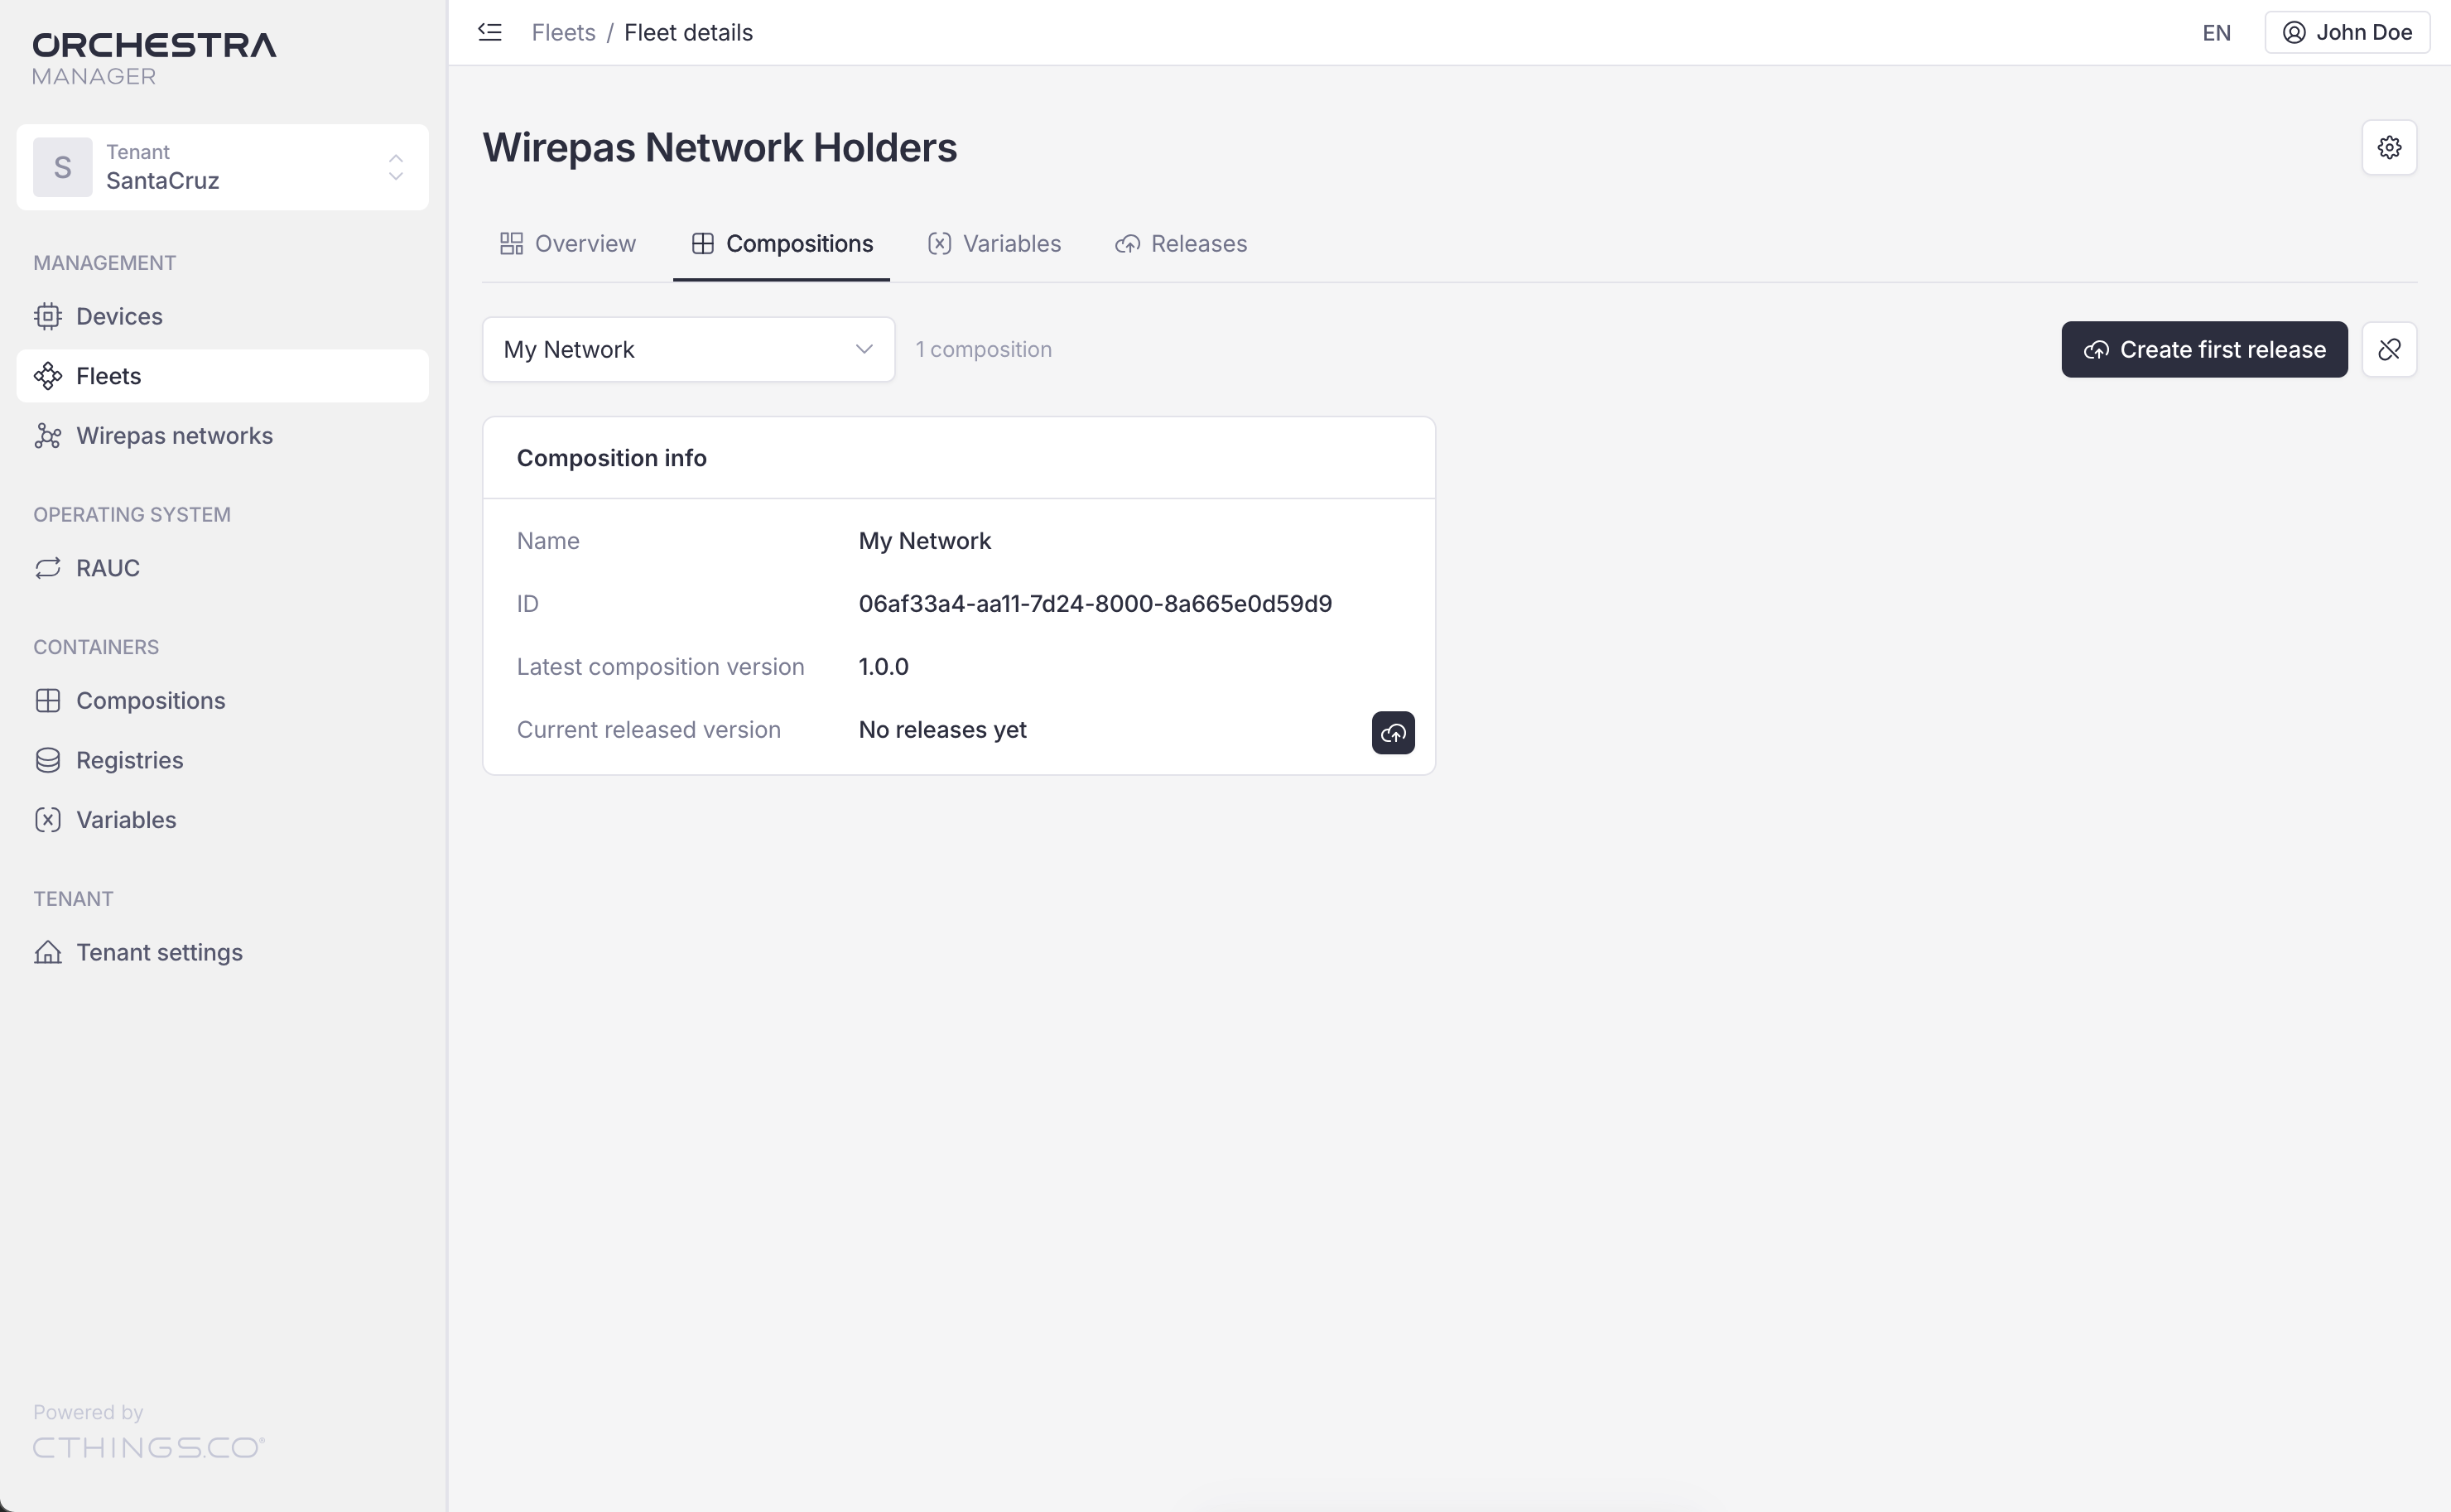
The Go to fleet button is in the top right corner, as shown in the following figure.
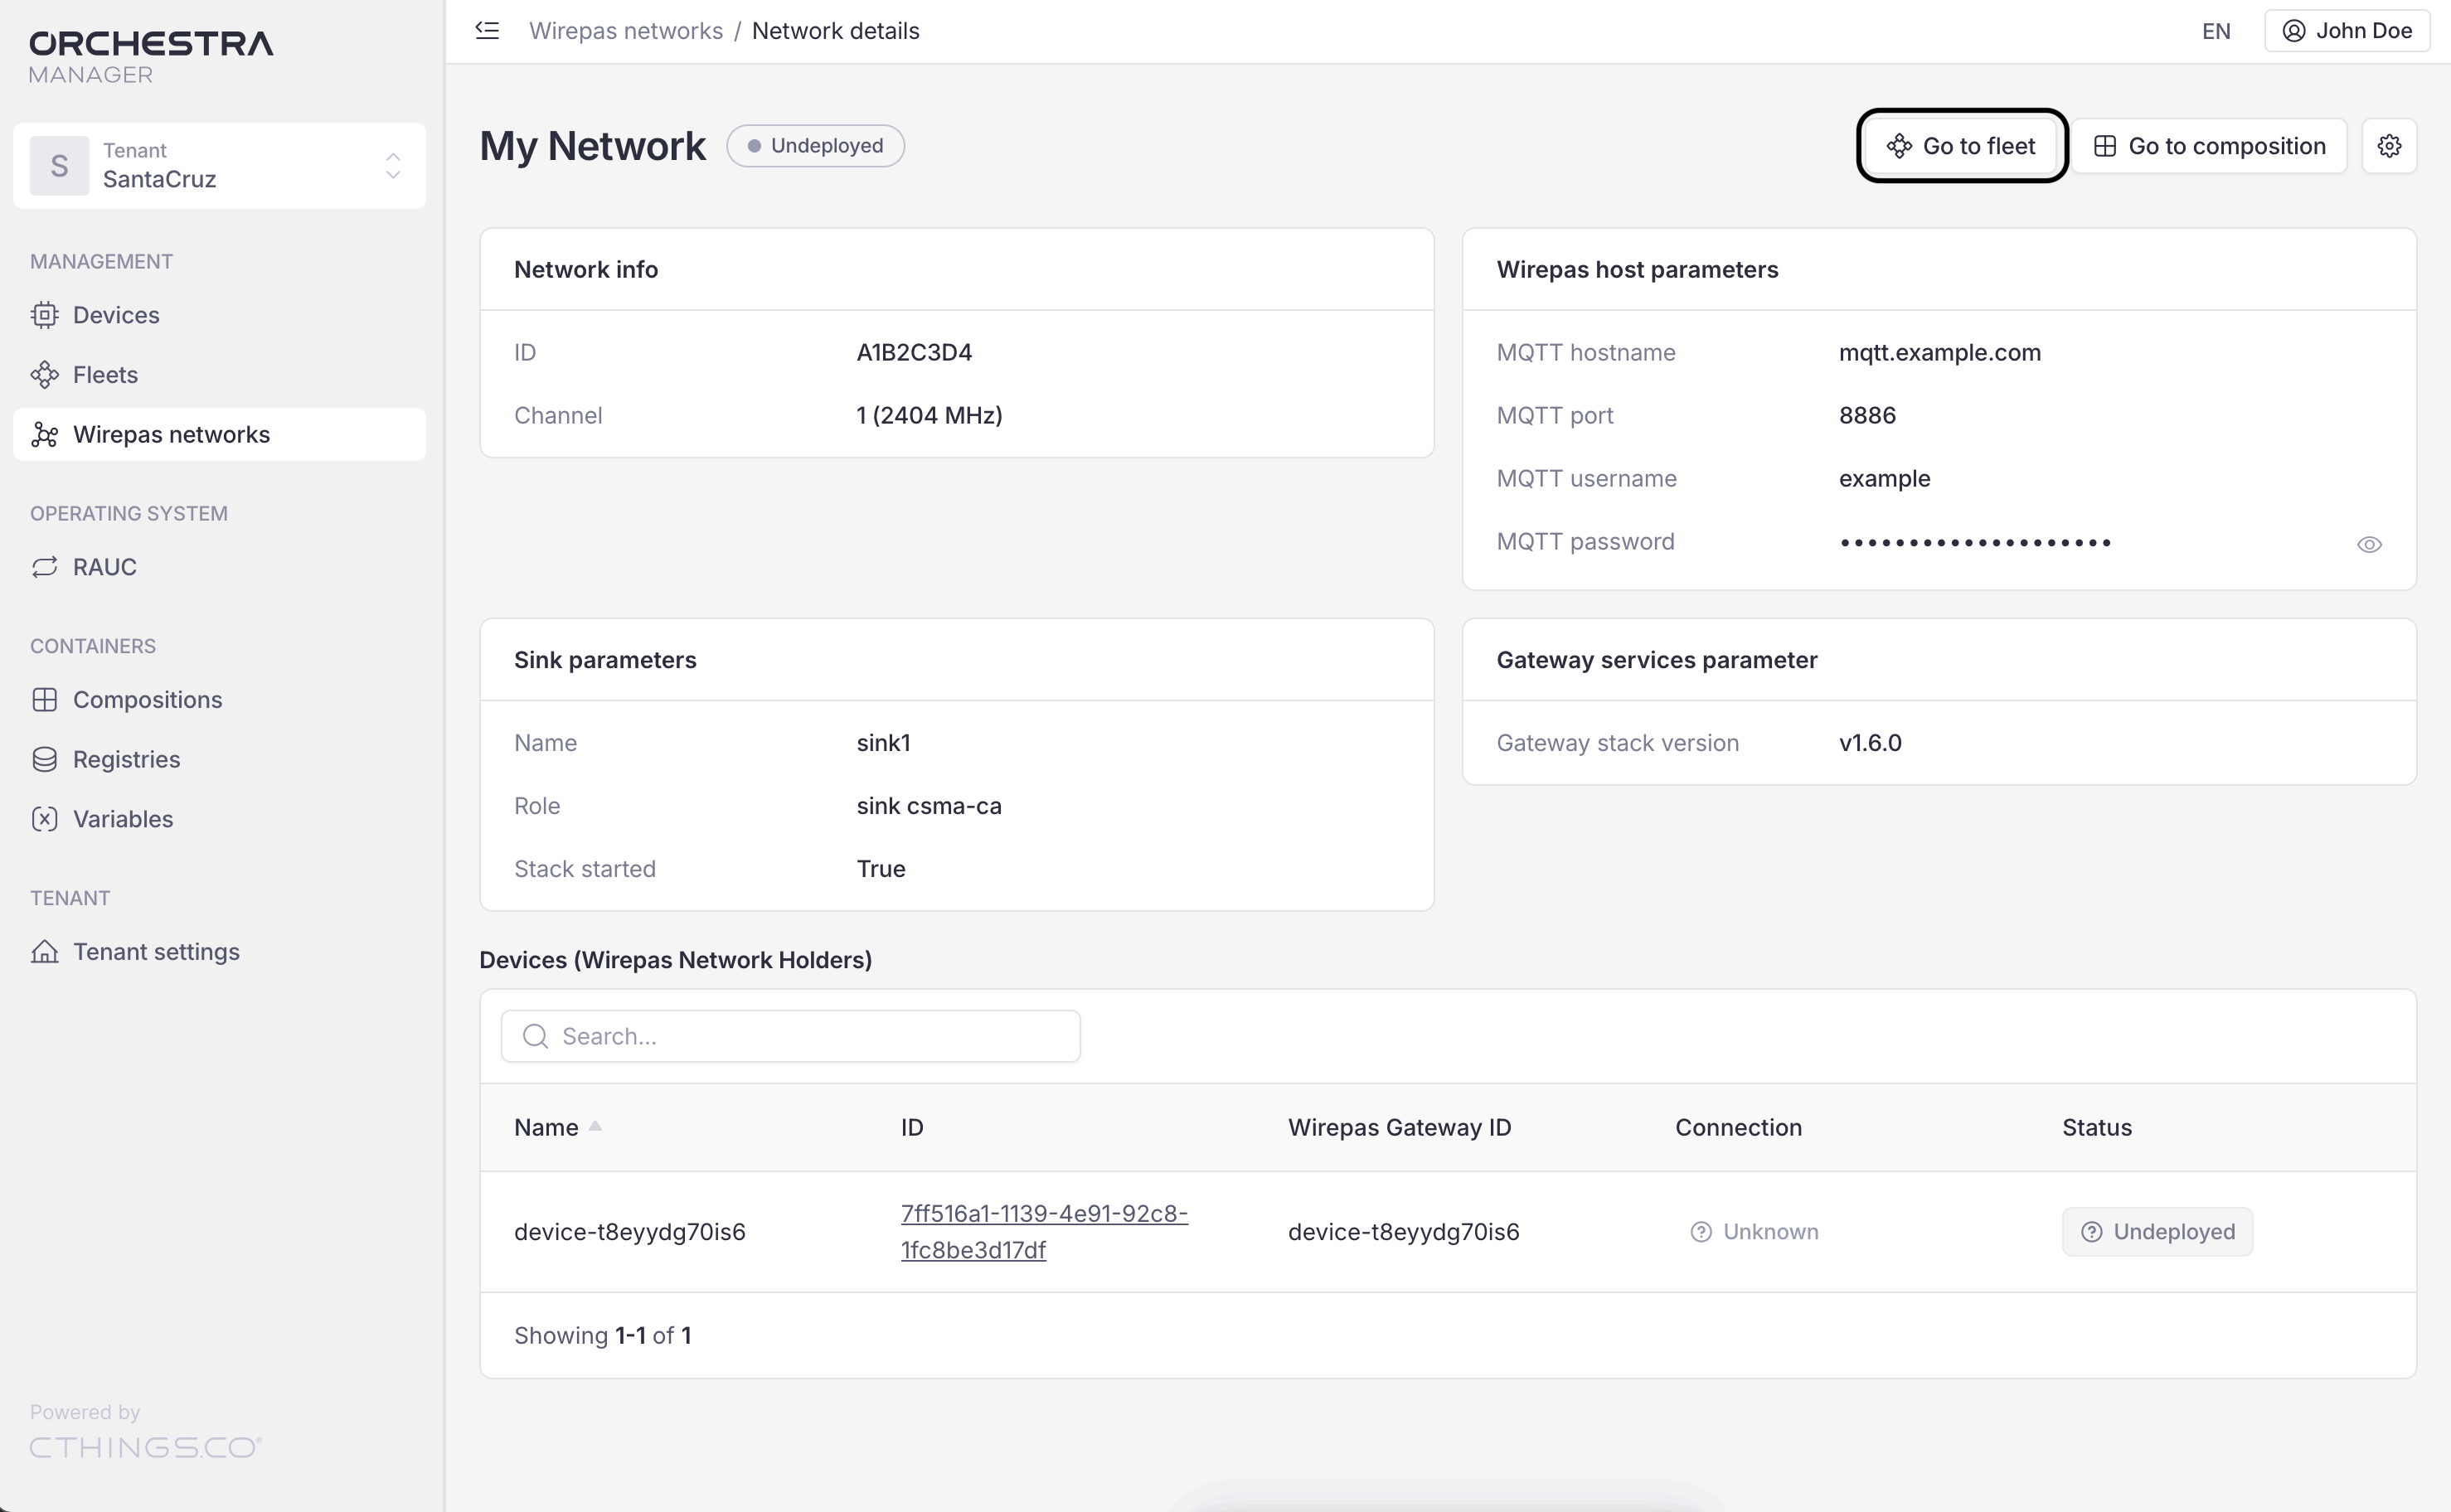
Press it, and you are redirected to the previously connected fleet.
TODO link to deploying a composition within a fleet (“For detailed information on how to deploy a composition within a fleet, see …”)
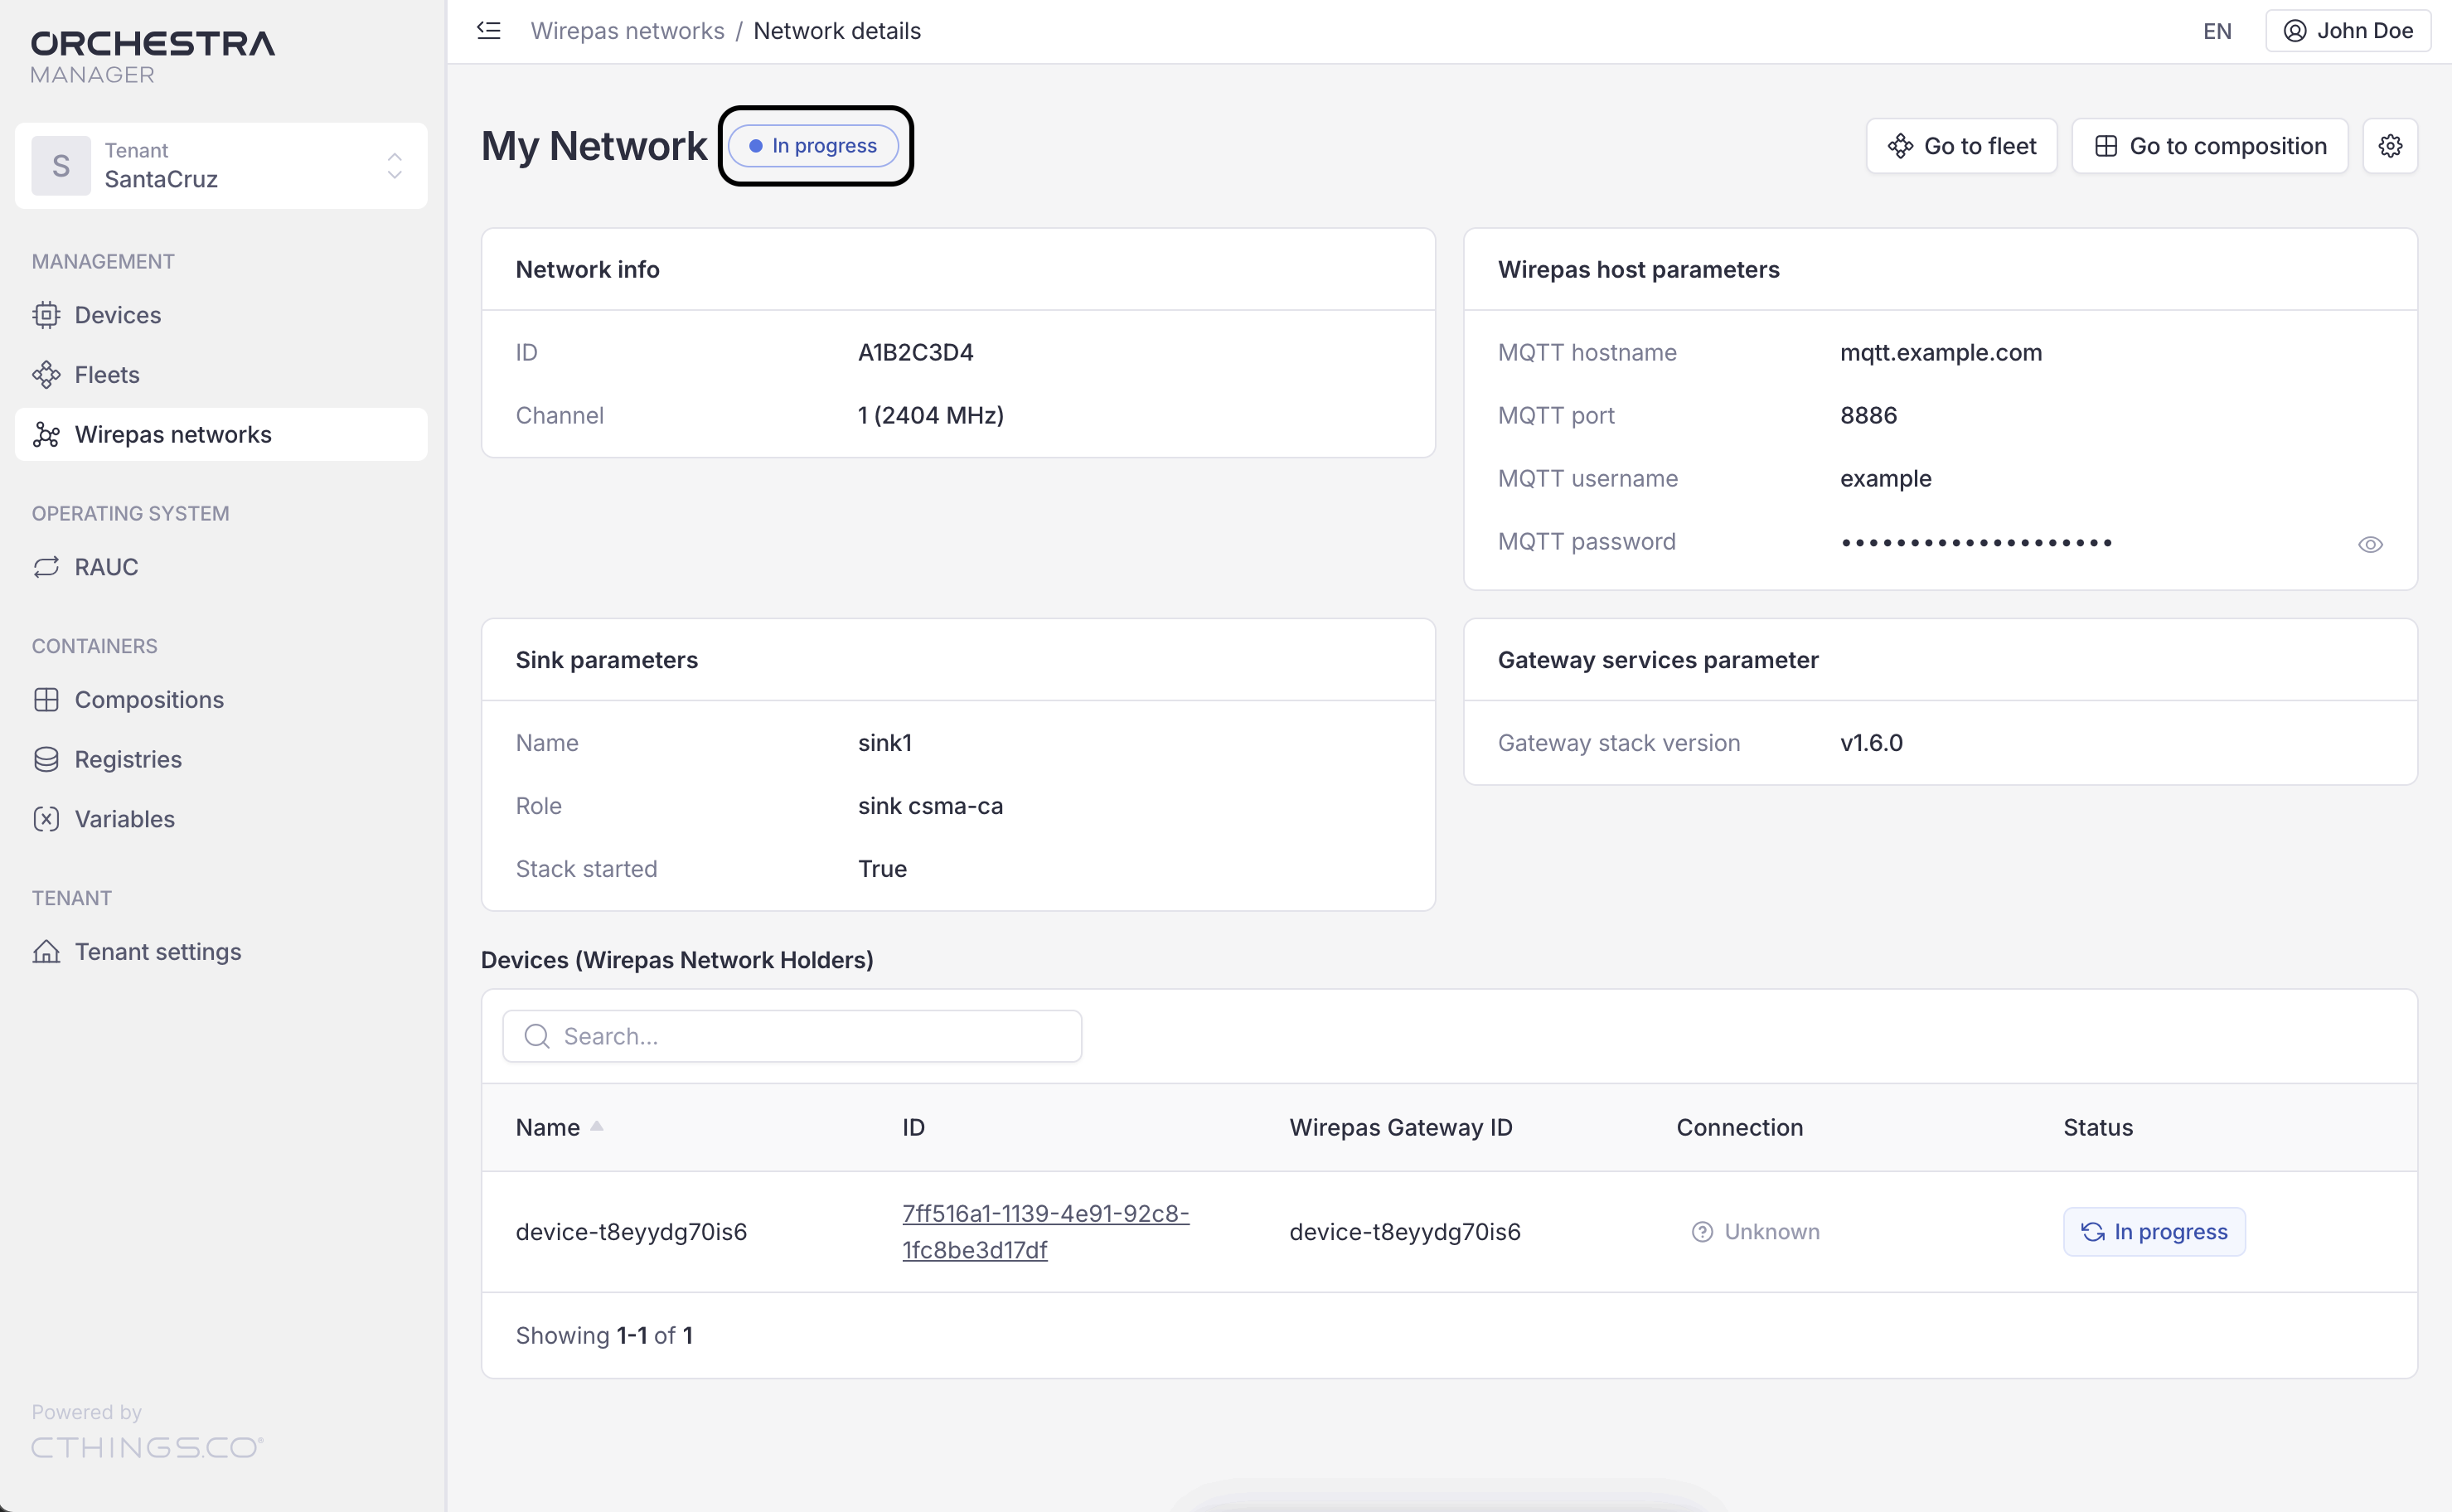
You can check the status of your deployment directly in the network tab, as shown in the following figure.
Important
Any changes you make to the network that affect the composition are not deployed automatically. They appear only after a redeployment or the deployment of a new version.
Change the network settings
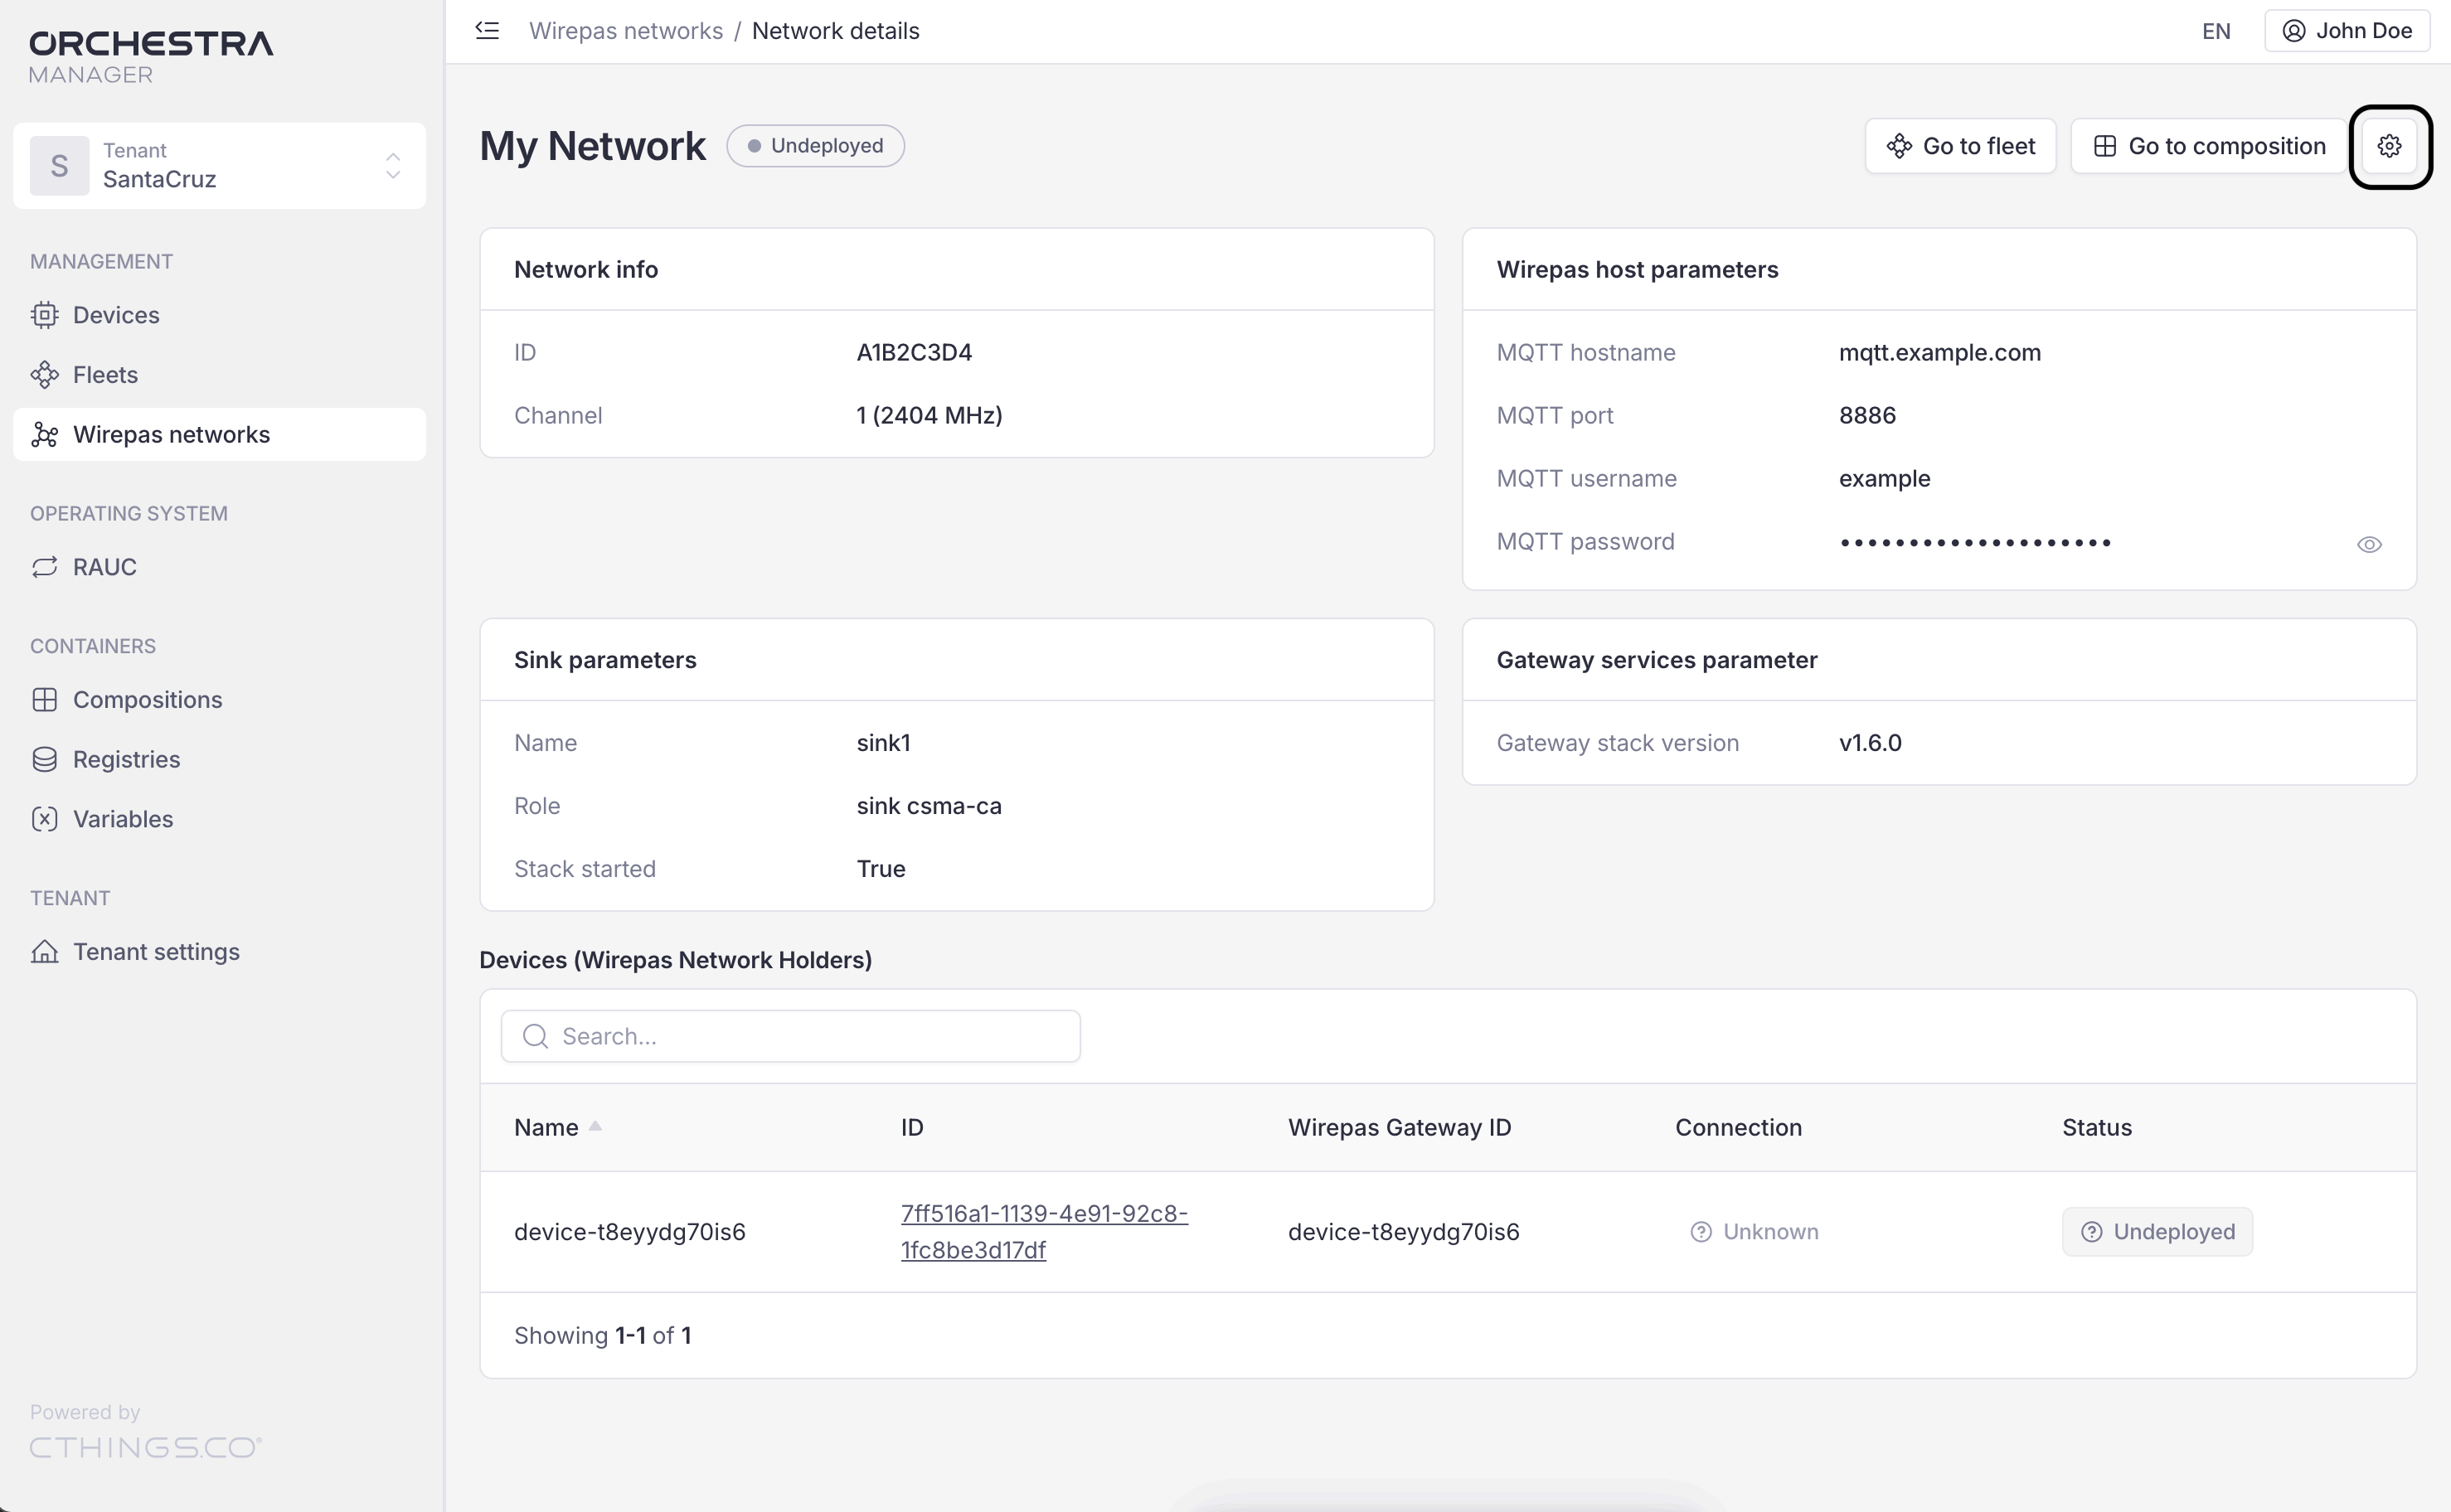
The settings button is in the top right corner, as shown in the following figure.
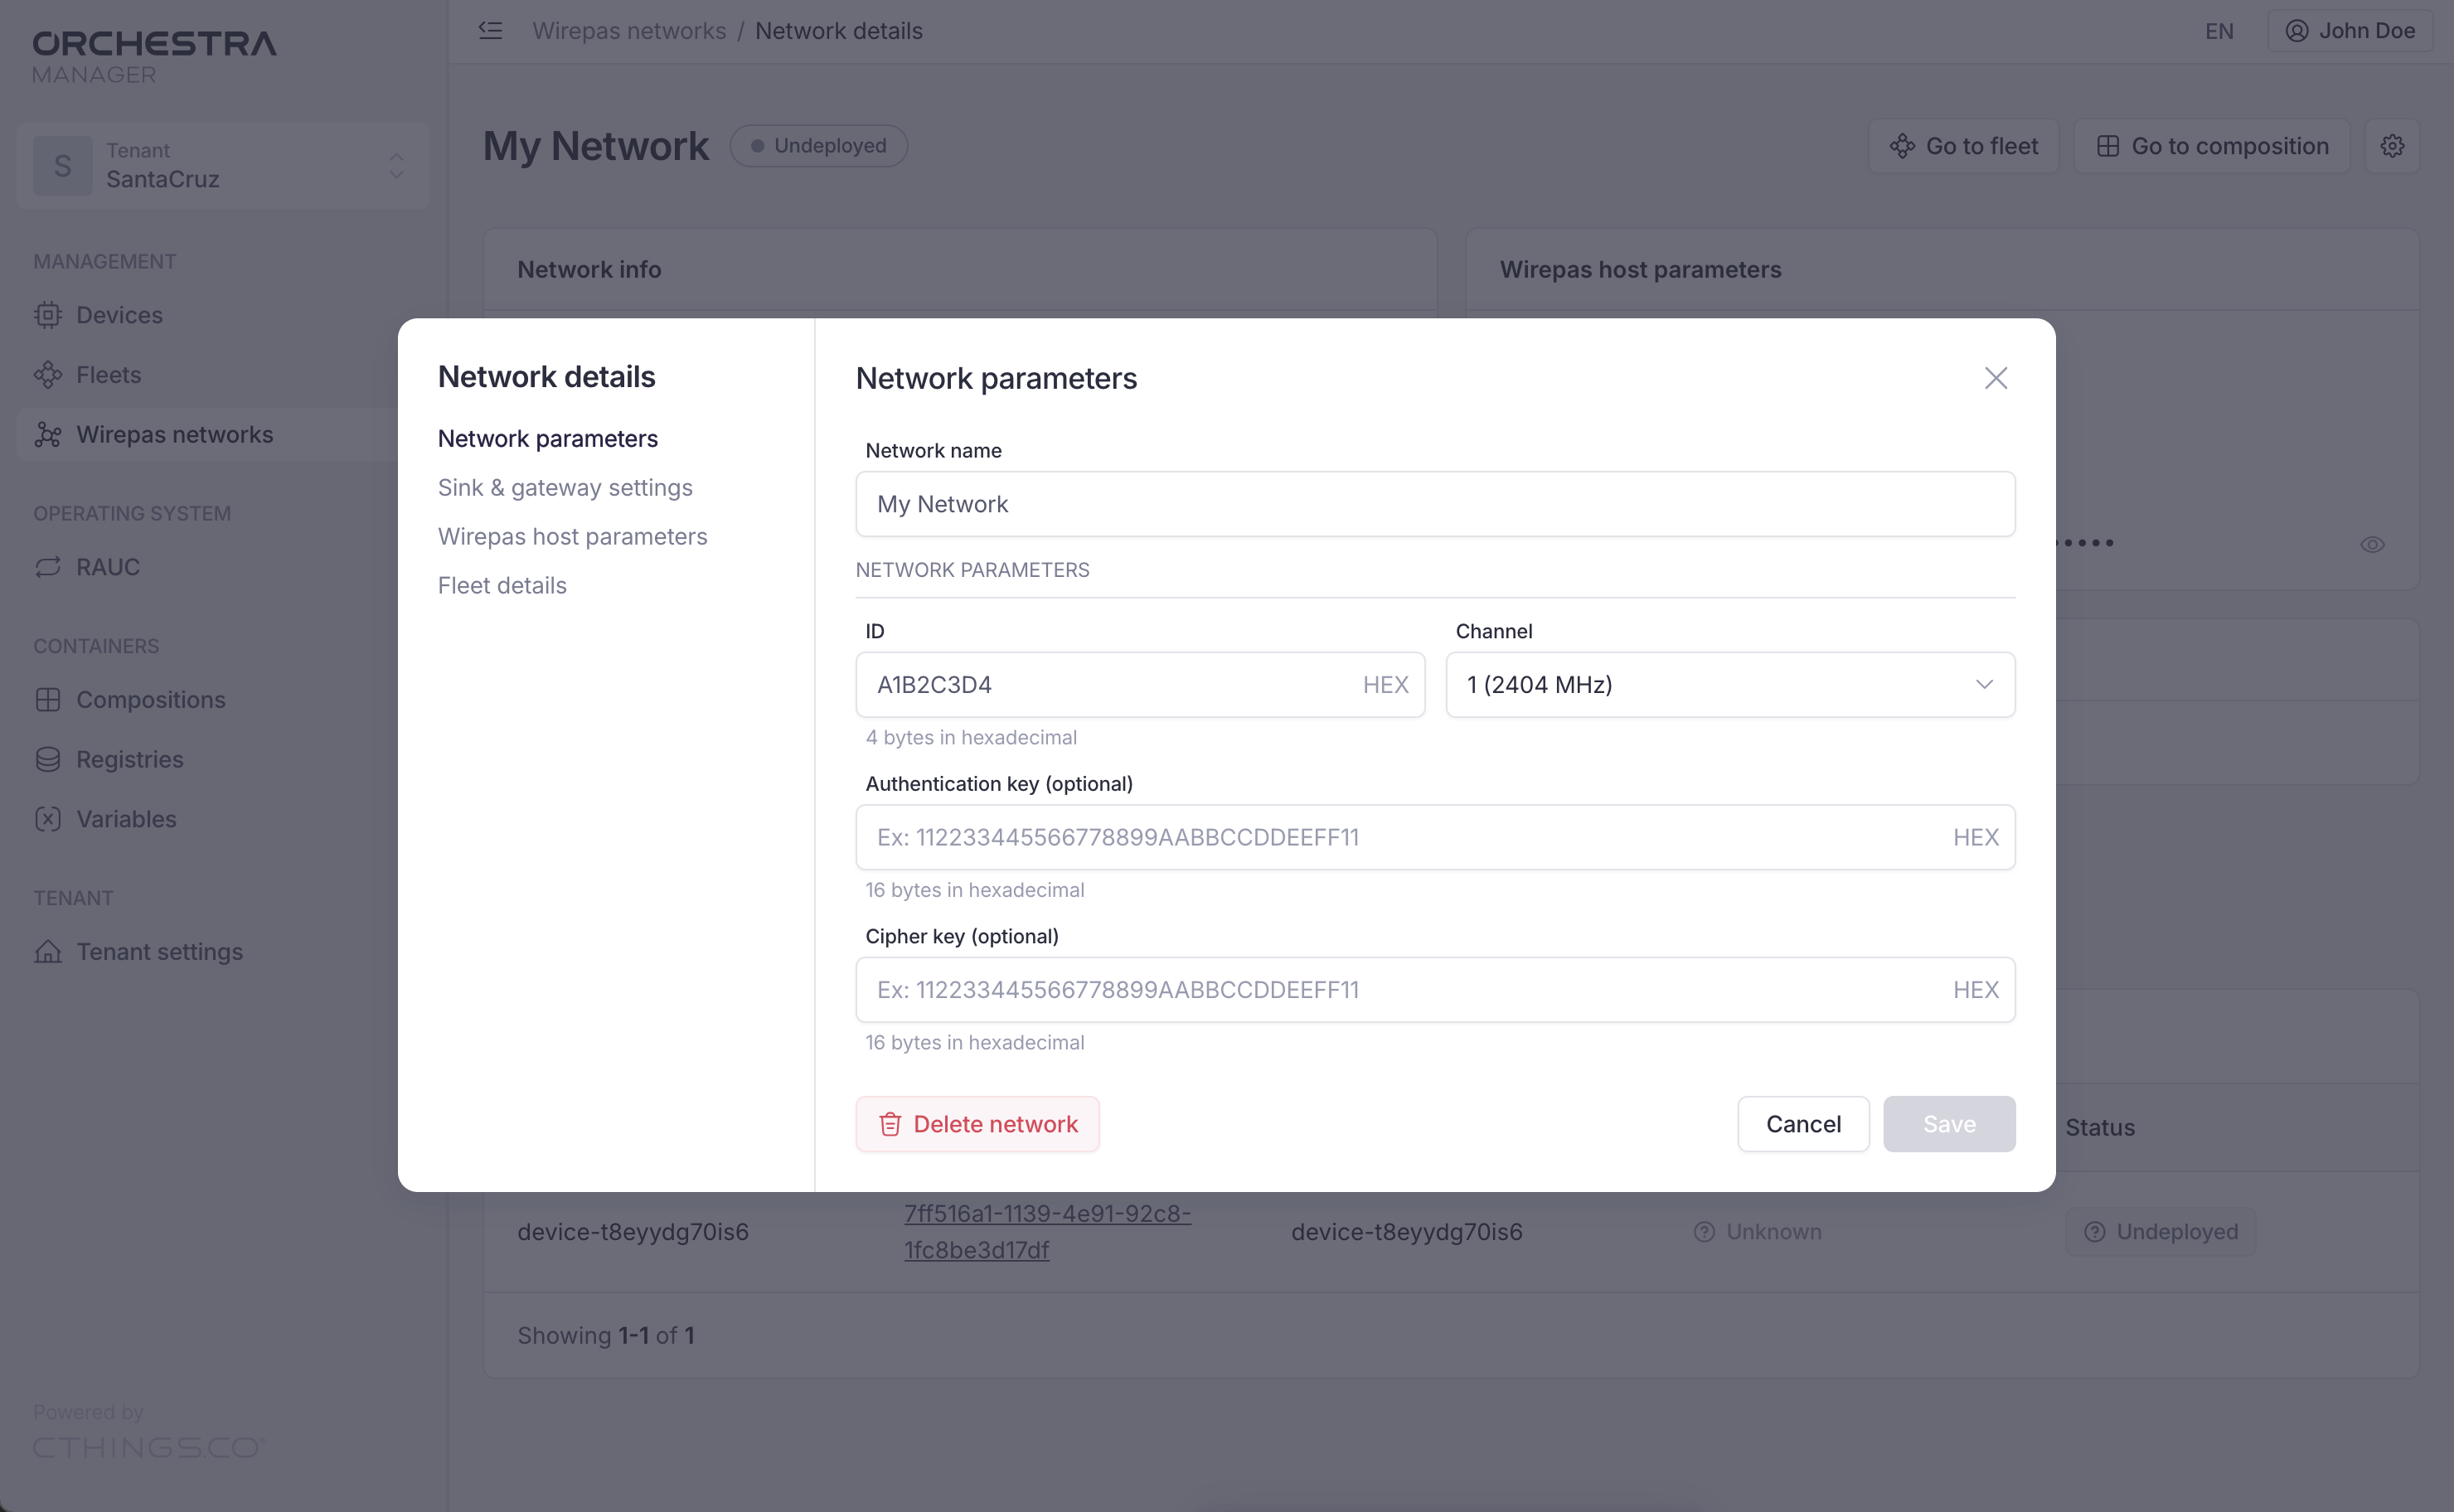
In the settings, you can apply changes to your network. You can change:
network name,
network ID and channel,
authentication and cipher keys,
sink role,
Start stack after configuration,
gateway stack version,
host parameters (MQTT credentials),
fleet.
Change the sink name
In the Sink & gateway settings tab, you can see that the sink name is read-only. If you need to change it, follow the next steps:
Go to your network and open its fleet section:
On the fleet page, open the Variables tab and find
WM_GW_SINK_ID. This is the variable that holds the sink name value.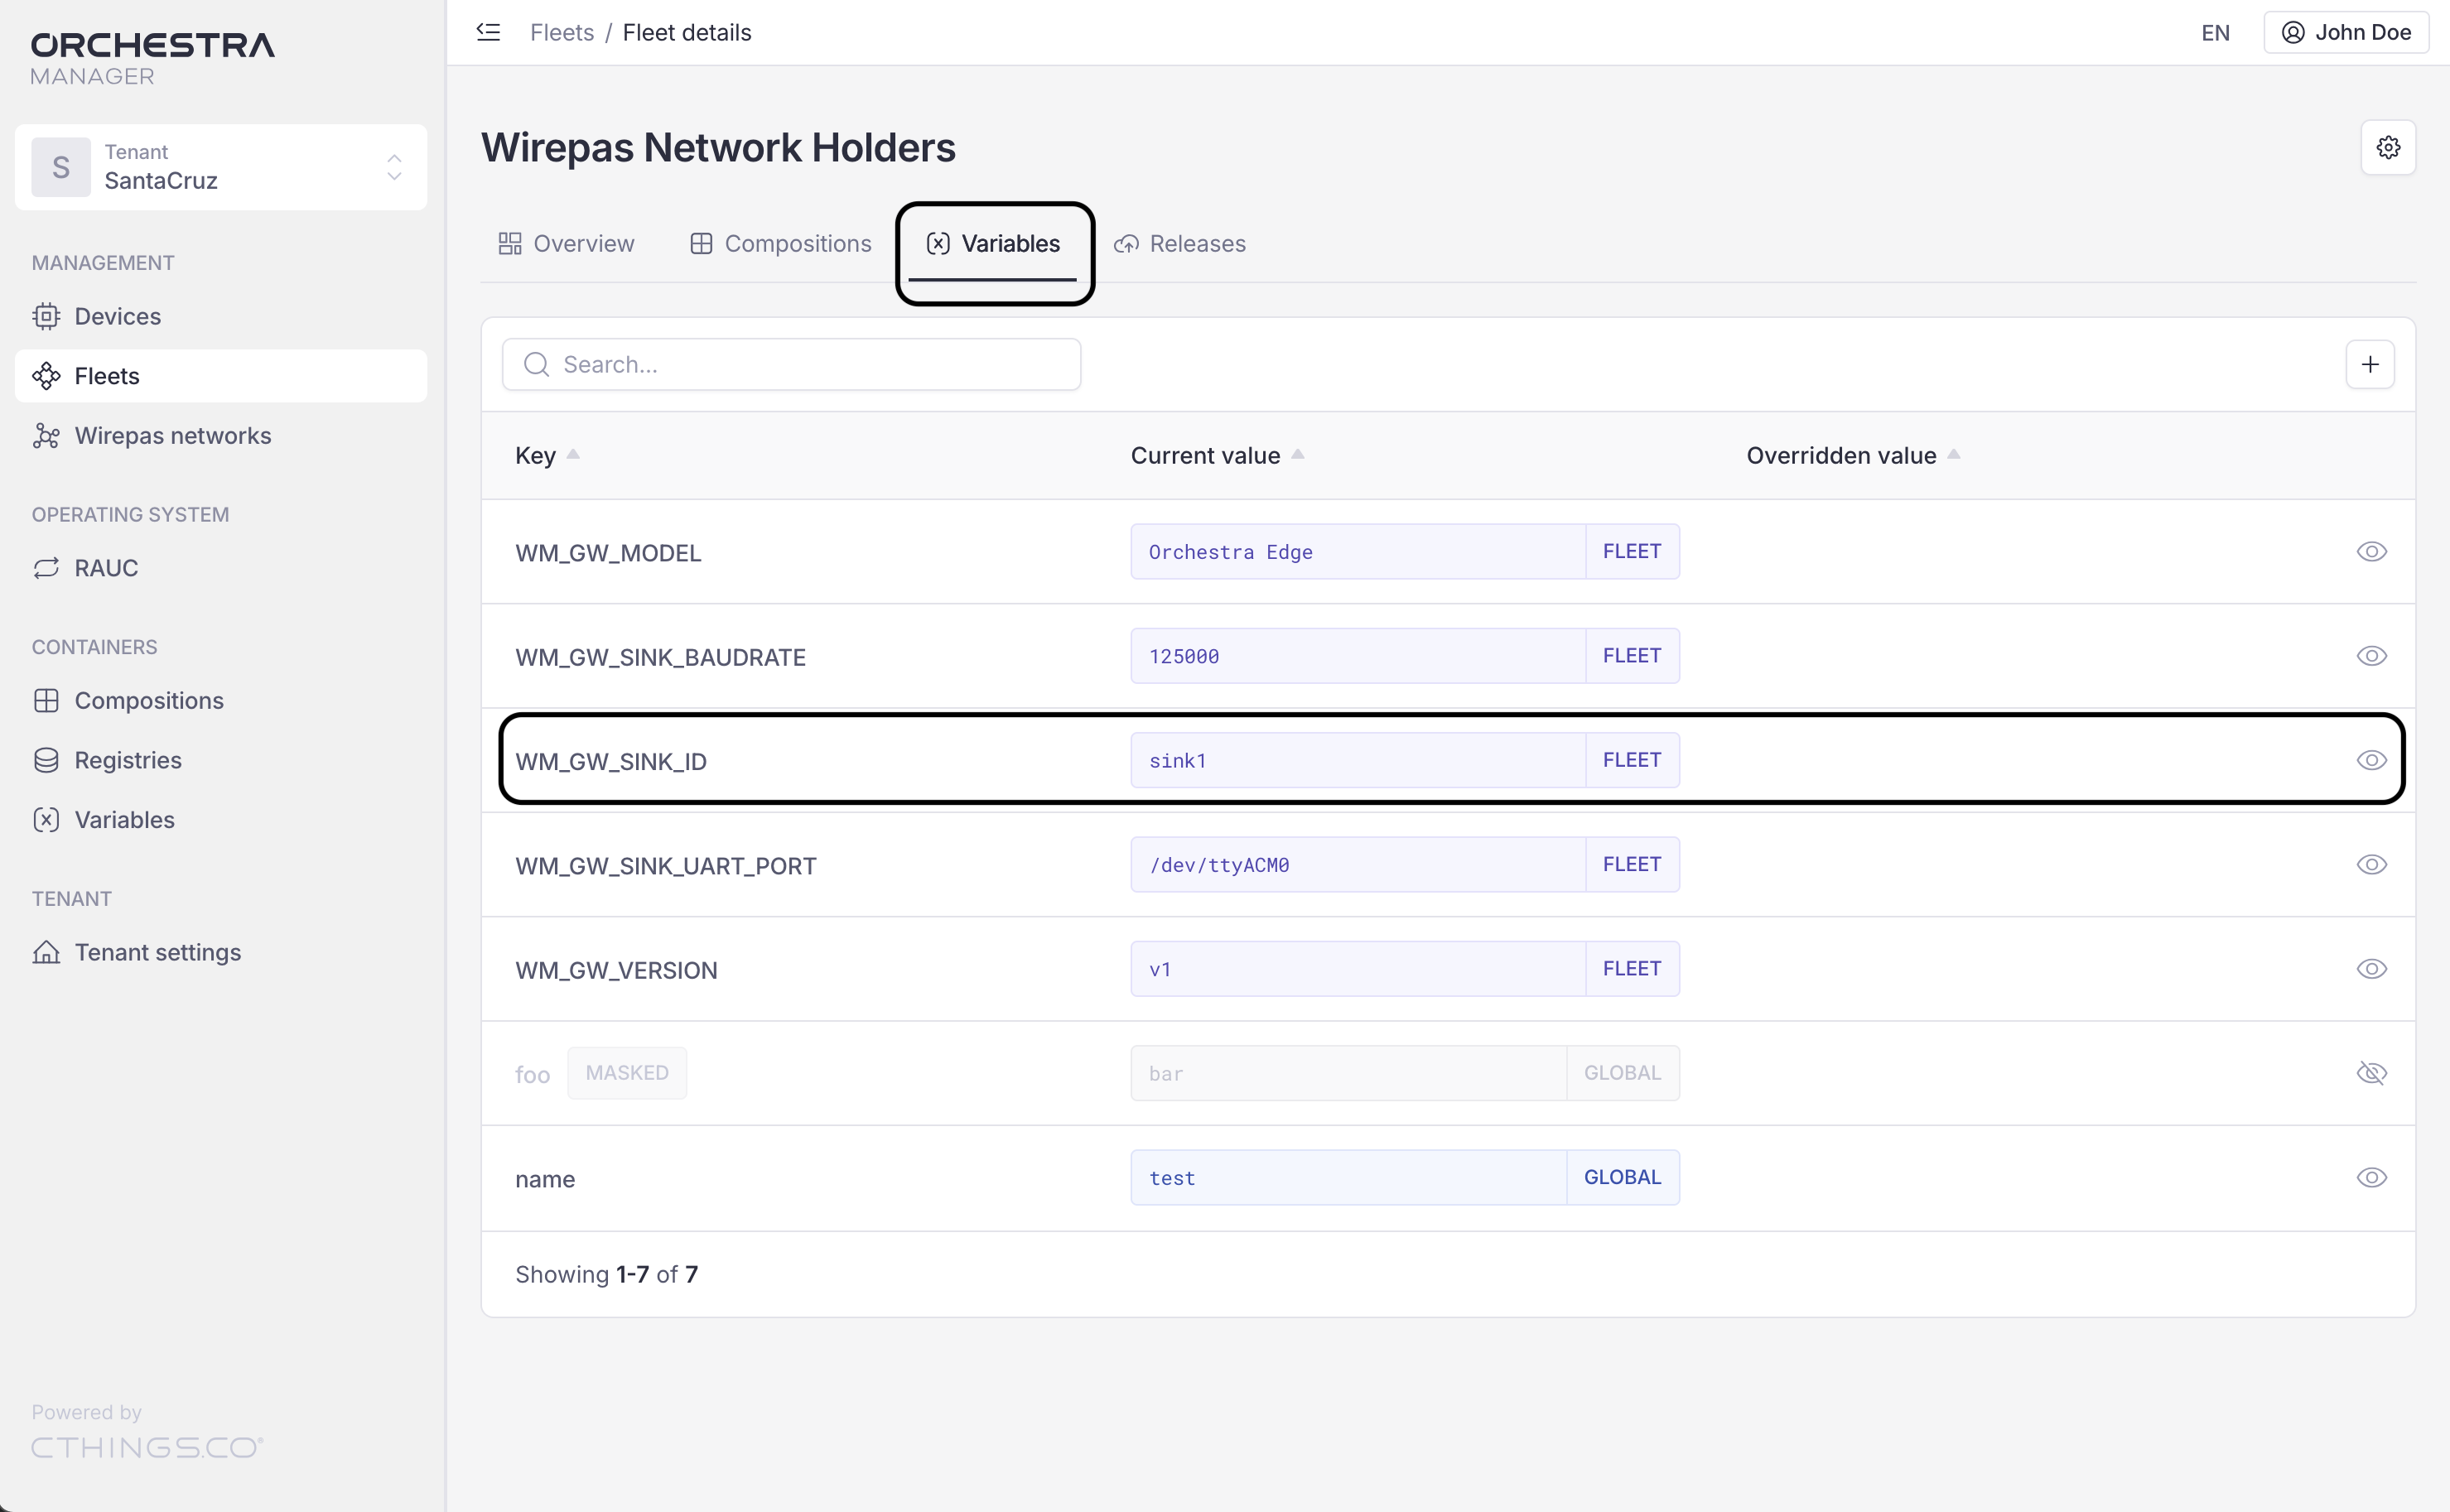
Click it and change the value.
Save your new value.
Check the Wirepas network settings. Your new value should be visible.